Are you looking for a way to protect your iPad from prying eyes or accidental taps? Locking the screen is one of the best ways to do this. With just a few simple steps, you can easily lock your iPad and keep it secure no matter where you go.
In this blog post, we will show you how to lock screen on iPad so that only authorized users can access it. We’ll also provide some tips on how to set up additional security measures for added protection. So let’s get started!
How to Lock Screen on iPad
Wondering how to enable screen lock on your iPad? You can lock your iPad screen by pressing the Sleep/Wake button at the top right of the device. This will put your iPad into sleep mode and turn off the display. The best way to lock your iPad is by enabling a passcode or Touch ID/Face ID lock in the Settings menu. Securing your device with a password or passcode makes it harder for anyone to access it without authorization.
Enabling iPad Lock Screen
There are many ways to secure your iPad with a screen lock. One of the most important ways to keep your iPad data safe is to lock your iPad screen. There are several ways you can do this — you can use a passcode, Touch ID, or Face ID.
If you’re using a passcode, be sure to use a strong one that is difficult to guess. Touch ID and Face ID allow you to unlock your iPad with just your fingerprint or face. These are great options as they don’t require you to remember a complex passcode and are very secure.
How to Lock iPad Screen with Passcode
Setting up a passcode on an iPad is relatively simple and offers an extra layer of security for your device. Here’s how to do it:
- First, open the Settings app on your iPad.
- Next, tap “Face ID & Passcode” or “Touch ID & Passcode.” If you have an older iPad model that doesn’t have Touch ID, you will instead tap on “Passcode.”
- Once you are on the passcode settings page, select “Turn Passcode On” to start setting up a passcode.
- You will then be prompted to enter a six-digit passcode
- Enter your desired passcode twice to confirm and save it.
- Once you’ve successfully entered a passcode, you will also be given the option to set up other security features, such as “Erase Data,” which is useful for wiping all data from your iPad after 10 failed passcode attempts.
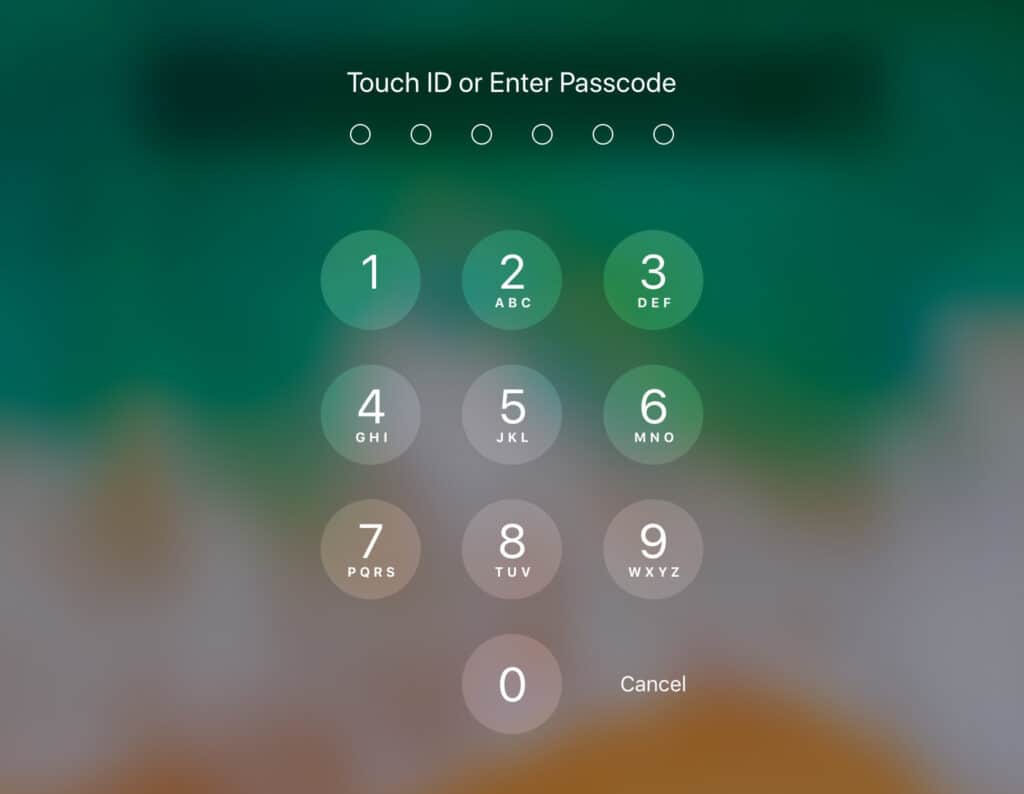
Once you’ve finished setting up your passcode, you can use it to unlock and access your iPad whenever you need to. You must remember your passcode; if you forget it, you will have to go through a lengthy process to retrieve it. Be sure to keep your passcode private and secure at all times.
How to Lock iPad Screen with Touch ID
Locking your iPad using Touch ID is a quick, easy, and secure way to keep your information safe. This tutorial will show you how to use this feature to maximize your device’s security. Touch ID is available on these iPads:
- iPad (5th Gen to 10th Gen)
- iPad Air (3rd, 4th, and 5th Gen)
- iPad Air 2
- iPad Mini (3rd Gen to 6th Gen)
- iPad Pro
As a failsafe for Touch ID, your iPad will also require you to set a passcode so you can use it to unlock your iPad in case Touch ID doesn’t work at any time. Follow the previous method to set up a passcode if you haven’t, and then use the method below to set up your Touch ID.
- Go to the Settings menu on your iPad
- Scroll down and tap the “Touch ID & Passcode” option.
- Now, select “Use Touch ID” from the menu.
- You will be asked to place your finger on the Home button of your iPad to register it for Touch ID use. Repeat this process for each additional finger you wish to register for Touch ID use.
- Once you’ve registered your fingers, select “Done” from the Touch ID & Passcode settings menu.
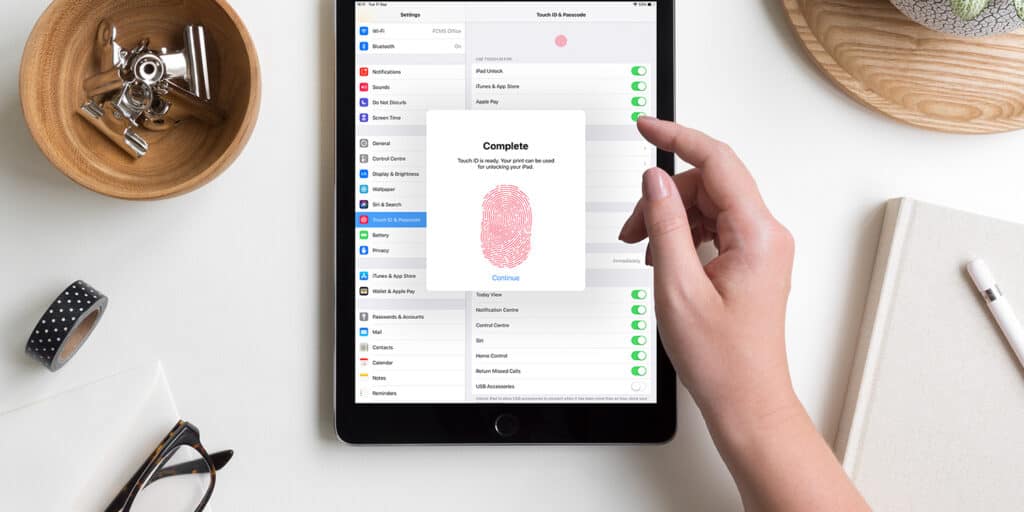
When you’re ready to lock your iPad, press the Home button twice in a row. This will bring up the Lock Screen. You can then place your finger on the Home button to unlock it with Touch ID. The iPad will recognize your fingerprint and open the device without asking you to enter a passcode.
How to Lock iPad Screen with Face ID
With Face ID, you can unlock your iPad with just a glance — which also means that no one else can unlock your iPad unless they’re an identical twin. However, not all iPads offer Face ID; only the iPad models listed below do:
- iPad Pro 12.9-inch (4th generation)
- iPad Pro 12.9-inch (3rd generation)
- iPad Pro 11-inch (2nd generation)
- iPad Pro 11-inch
Follow the instruction below to lock your iPad screen with Face ID:
- First, open the Settings app on your iPad.
- Then, scroll down and select “Face ID & Passcode” from the list.
- Now, tap “Set Up Face ID” at the top of the screen. You will be prompted to move your head in a circle so that Face ID can get a good scan of your face.
- After it is done, tap “Continue” and then enter your passcode.
- Now you have successfully set up Face ID on your iPad!
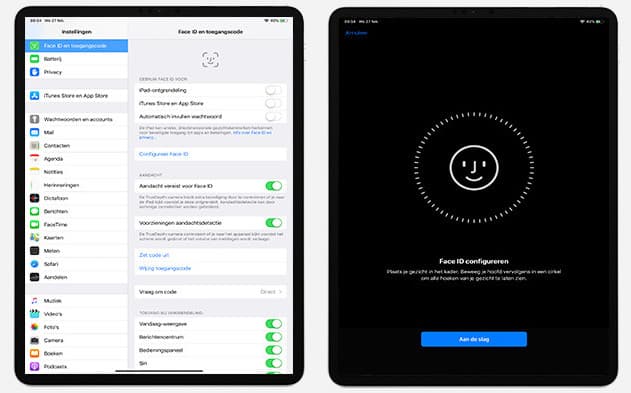
You can use Face ID to unlock your device instead of entering your passcode when you lock your device. All you need to do is look at your iPad, and it will recognize your face and unlock the device. You can also choose “Require Attention for Face ID” in the Settings app if you want to ensure that the device only unlocks when looking directly at it.
How to Set Up Automatic Locking for Your iPad
One of the best ways to keep your iPad secure is to set up automatic locking. Locking your device automatically every time you’re not using it will help you protect your data and ensure that unauthorized people cannot access it.
Follow the steps below to enable automatic lock on your iPad.
- Open the Settings app on your iPad.
- Scroll down and select the “Display & Brightness” option.
- On the next page, locate and tap the “Auto-Lock” option.
- You will be presented with five different time intervals. Select the one that best fits your needs.
- Tap “Done” to save your changes and exit the Settings app.
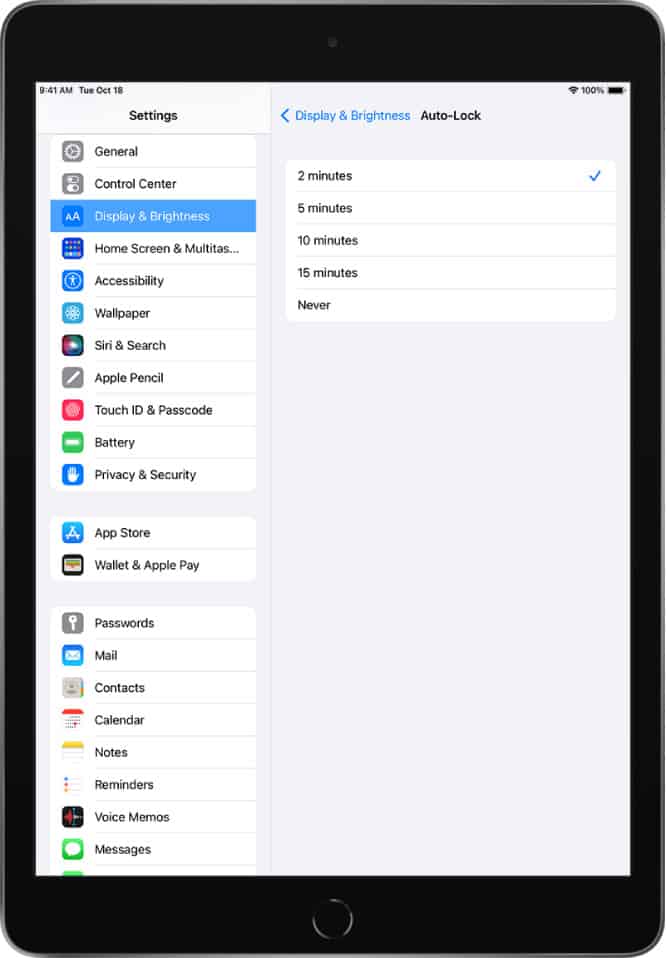
Your iPad will now automatically lock itself after the amount of time you set has passed. If you want to disable Auto-Lock, simply repeat these steps and select “Never” as the time interval.
Additionally, you should also make sure that you enable two-factor authentication so that even if someone were to guess or obtain your password, they would still need an additional security code to gain access to your Apple ID.
Remember to always keep your software up to date by regularly checking for software patches and installing them as soon as they become available. Keeping your iPad secure is necessary to ensure the safety of your personal data and help keep you safe from potential harm.
How to Use Guided Access Mode on Your iPad For Screen Locking
Guided Access Mode is a unique feature that allows you to lock your iPad’s screen to control what apps and features are accessible. This is a handy feature for parents who want to limit their children’s access to certain apps, or for teachers who need to control the use of iPads in a classroom setting.
Here’s how to set up Guided Access Mode on your iPad:
- Go to Settings > General > Accessibility and tap Guided Access.
- Tap the toggle switch at the top of the screen to turn on Guided Access Mode.
- Set a Passcode that must be entered to exit from guided access mode.
- Tap the Options button to customize other options, such as setting time limits, allowing touch input or motion, and disabling certain areas of the screen.
- Once you have set your options, tap Start at the top of the screen to enter Guided Access Mode.
- To exit from guided access mode, triple-click the Home button and enter your Passcode.
- You can also turn off Guided Access Mode in Settings > General > Accessibility.
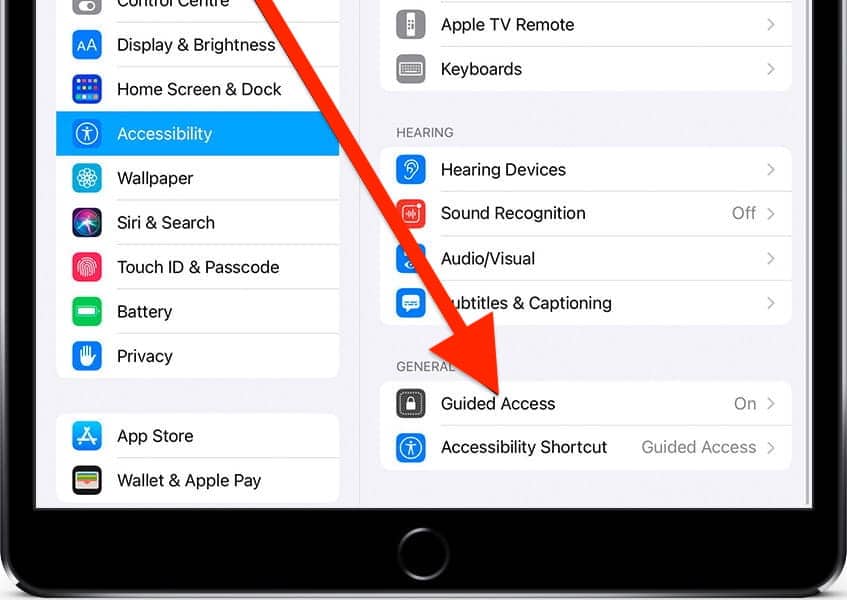
With this feature, you can easily limit access to certain apps and features while still enjoying all of your iPad’s benefits. If you have kids who use your iPad and want to block YouTube access for them, then check out our guide on blocking YouTube access on iPad.
Frequently Asked Questions
Now that we have shown you all about how to lock the screen on iPad, let’s answer some related questions as well.
How do I lock my iPad screen while watching?
You can lock your iPad screen while watching by using the Guided Access mode. You can limit your iPad to just one app by enabling this feature in the Settings menu.
How do I freeze my iPad screen for my baby?
You can freeze your iPad for your baby by turning on the Guided Access Mode from the settings menu. This feature will freeze your screen, so your baby won’t be able to access iPad functions.
Conclusion
Locking your iPad screen is essential to keeping it secure and protecting the data stored within it. We hope this guide on how to lock screen on iPad has provided you with all the information necessary to help you lock your device quickly and easily.
Whether you’re using a passcode, Face ID, or Touch ID, make sure that your security settings are up-to-date for added peace of mind when it comes to safeguarding your personal information. You can ensure enhanced protection on your Apple devices by following these simple steps!

Leave a Reply