We are fans of Chromebooks — these devices are light (literally and software-wise), zippy, and excellent work machines for most people. But we often see questions on the internet, like how to copy and paste or how to split screen and work on a Chromebook.
We’ve already covered those topics, and today, we want to answer an equally popular question — how to save image on Chromebook. Keep scrolling because we have listed four different ways to store pictures on your hard drive. At the end of this guide, you will know everything about how to save images on Chromebook!
How to Save Images on Chromebook
Saving an image on a Chromebook is pretty easy. Open up the website that has the image you wish to save, and right-click on the image using your mouse (long-press for touchscreen Chromebooks). You will now see a “Save image as” option that you can select. This will open up a file explorer that lets you choose where to save the image. The default location is the Chromebook’s Downloads folder.
And that sums up how to save pictures on a Chromebook!
Saving an Image on a Chromebook

There are a few different ways to save images on your Chromebook. You can use the traditional method — the right-click, or you could use your touchpad to access the context menu to save pictures. And as always, you guys get a bonus method to save images — using drag and drop.
Keep reading to learn them all!
Using your Mouse
To save an image on a Chromebook using your mouse, you can follow these steps:
- Open a Chrome window and navigate to the webpage that contains the image you want to save.
- Right-click on the image and select “Save image as” from the context menu.
- Choose a location on your Chromebook where you want to save the image (via the Files app). Ensure you remember where you saved the file, or you’ll struggle to find it later!
- Rename the image file if you like.
- Click the “Save” button to save the image to your Chromebook disk.
Using your Touchpad
The touchpad method for saving images is quite similar to the mouse method we described above — the only difference is how you right-click.
Here are the instructions to save a file using your touchpad:
- Open the link to the picture that you want to save.
- On your Chromebook touchpad, do a two-finger tap — this is a right-click. Another way to access the right-click menu is by pressing the Alt key on your keyboard and then tapping the touchpad once.
- A context menu will appear — from this menu, choose “Save image as.”
- You will now have to select a location to save the file. You can also change the filename in this step.
- Once you hit the Save button, the image will be downloaded and saved on your Chromebook!
Here’s a video that shows you how to do this:
Using Touchscreen Controls
If you’re using a 2-in-1 or a tablet Chromebook, you can use this method to save images.
- Open the webpage that contains the image you want to save.
- Tap and hold the image with one finger for a few seconds.
- A menu will appear on the screen — select “Save image” from this menu.
- When the Files app appears, choose the location on your Chromebook where you want to save the image.
- Rename the image file if desired.
- Hit the “Save” button to save the image — congrats, your image is saved!
Using the Drag and Drop method

And now we get to the bonus method! To drag and drop an image on a Chromebook to save it, follow these steps:
- Open the Chrome browser and navigate to the webpage that has the image you want to save.
- Using your cursor or touchpad, click and hold your pointer on the image.
- Drag the image to the folder on your Chromebook where you want to save it.
- Release the mouse or touchpad to drop the image into the folder.
- The image will be saved to the folder you dragged it to.
Alternatively, you can also drag and drop the image onto your desktop or the Files app on your Chromebook to save it. Once the image is saved, you can access it from the folder where you saved it (via the Files app) or from the Downloads folder.
Where to Find Saved Images on a Chromebook?
Saved images on a Chromebook can be found in the Downloads folder or any other folder where you have chosen to save them.
To locate the Downloads folder, follow these steps:
- Click on the Launcher icon in the bottom left corner of your screen.
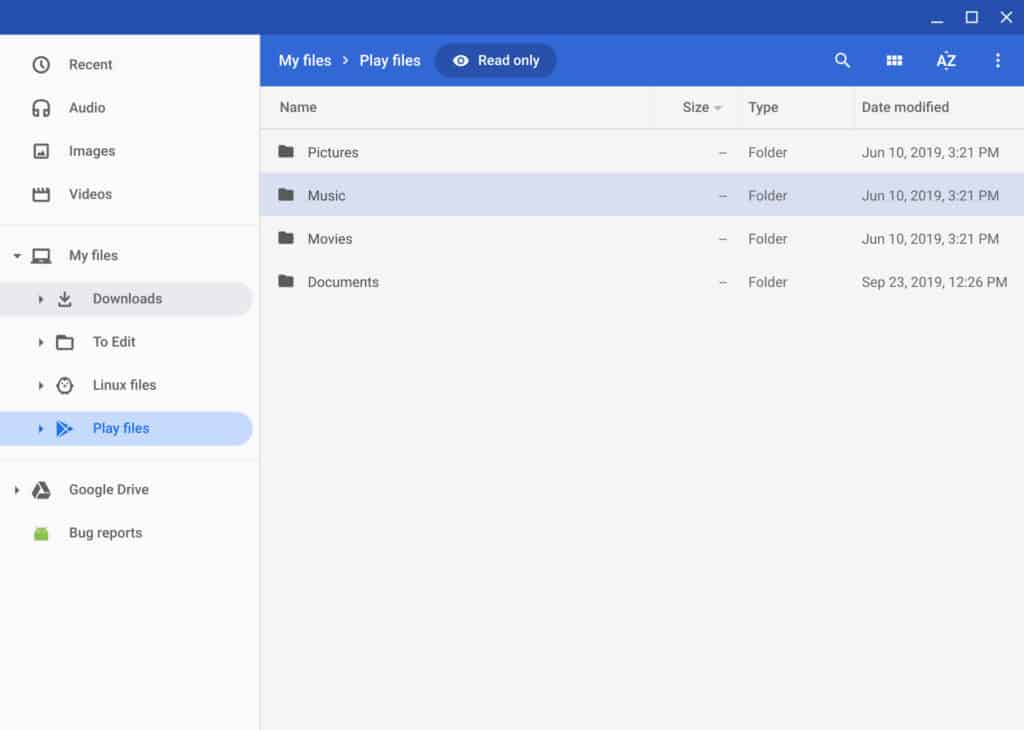
- Click on the “Files” app (the icon that looks like a folder).
- In the Files app, click on “Downloads” in the left-hand sidebar.
- All the files and images you’ve downloaded on your Chromebook, including saved images, will be stored in this folder.
- If you have saved images to another folder on your Chromebook, you can navigate to that folder by opening the Files app and browsing through the folders in the left-hand sidebar.
You can also use the search bar in the Files app to search for specific images by file name.
How to Attach or Upload Saved Images on a Chromebook

So now that you know how to save images, how do you attach them to emails or upload them to websites or apps? To attach or upload saved images on a Chromebook, follow these steps:
- Open the app or website where you want to attach or upload the image.
- Click on the “Attach” or “Upload” button or icon within the application or website (these differ for websites and apps).
- In the file explorer window that appears, navigate to the folder where the image is saved. You can use the sidebar (it’s on the left side) in the Files app to browse through folders or use the search bar to search for the file name.
- Once you have located the image, click on it to select it.
- Click on the “Open” or “Select” button within the file explorer window to attach or upload the image to the application or website.
Alternatively, you can also drag and drop the image from the folder where it is saved directly into the application or website you want to attach or upload it to.
Frequently Asked Questions
Now, let’s look at some commonly asked questions related to the topic of saving images on a Chromebook.
How do you save a picture on a Chromebook without right-click?
If you don’t want to use a right-click for some reason (or it’s disabled on a work or school Chromebook), you can still save an image using the screenshot method. Once the image you want to save is on your screen, simply use this key combo: Ctrl+Shift+Switch Window. If you have a 2-in-1 or tablet Chromebook, press the Power and Volume Down keys simultaneously.
How do you right click on a Chromebook?
When using your Chromebook touchpad, if you tap it once with two fingers — your device reads it as a right-click. If you are using a tablet Chromebook (or a 2-in-1), a long press translates to a right-click.
How do you save on a Chromebook?
Saving an image or a file on a Chromebook is pretty easy — right-click on the picture to save it. If it’s a file, tap the download button (as you would on your laptop) and you will be asked where you wish to save it. You can either save it to the Downloads folder or choose a specific folder on your Chromebook!
Conclusion
We hope this guide on how to save images on Chromebook helped you figure out this simple process. As you can see, it’s literally the same as your regular Windows or mac computer. However, it can seem unintuitive to someone who’s completely new to using a Chromebook. Now that you’ve figured out how to save image on Chromebook, you should also read our guide on deleting files on a Chromebook!

Leave a Reply