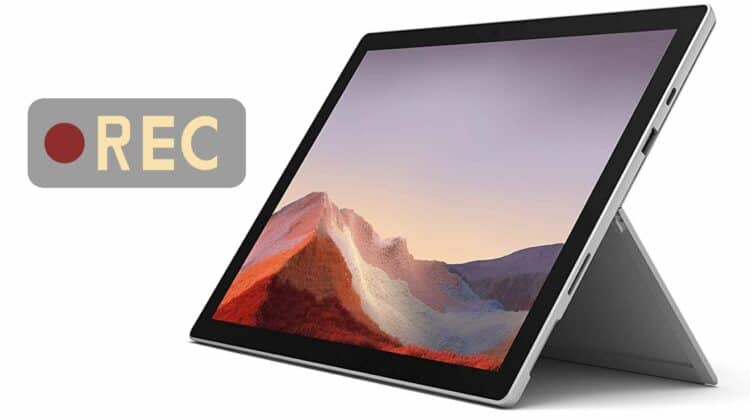
With Surface Pro, Microsoft has created a detachable (2-in-1) tablet that offers Windows 8 to 10 versions as operating systems. This incredible device allows you to study and work on the go, making it ideal for anyone who wants maximum convenience with no compromise in performance.
A Surface Pro is like having a laptop, whether in college or working from home — but so much better! If you’re a student or professional trying to figure out how to screen record on Surface Pro, then look no further. Screen recording on your Surface Pro is doable and only takes a few minutes!
We’ve got you covered! In this article, we share four exceptional screen recorder apps that will ensure you can screen record on your Surface Pro effortlessly.
How to Screen Record on Surface Pro
To record your screen on the Microsoft Surface Pro, you first need to open the Start Menu, type “Xbox” in the search bar, and then click on the “Xbox Game Bar” app. To begin using the Surface Pro screen recording function, you can either click on the Start Recording button or press Win + Alt + R on your keyboard. To end the recording, press the “Stop” button or strike the Win + Alt + R combination on your keyboard. You can also use Microsoft’s Game Bar for screen capture.
How to Record Your Screen on Surface Pro
Check out all the methods that you can use to record your screen on a Surface Pro below.
Screen Recording on Surface Pro With Xbox Game Bar App
Xbox Game Bar on Surface Pro is a convenient tool that makes it simple to take videos, gameplay recordings, and snap screenshots. You can enjoy effortless video recording without any hassle with just a few clicks.
If you’re looking to record presentations, tutorials, webinars, or any other type of content on your device with ease and convenience, then the Xbox Game Bar is perfect for you. With its flexible options, such as adjustable audio quality, recording mode customization and more — it’s bound to meet all your needs.
But be mindful that the recording will affect your Surface Pro’s performance and battery life before hitting that ‘record’ button.
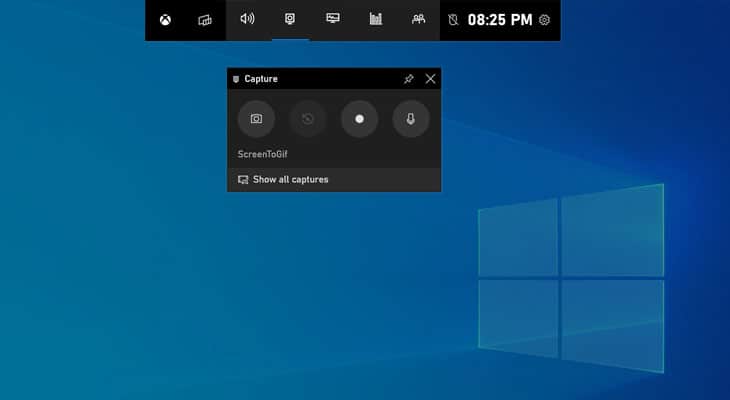
How to screen record with Xbox Game Bar app on Surface Pro
Perform screen recording on your Microsoft Surface Pro using Xbox Game Bar app by following the steps below:
- Launch “Start” on your Surface Pro and then enter “Xbox” in the search field.
- Click on “Xbox Game Bar,” and you’ll find a variety of choices to capture screen on Surface Pro, including “Capture,” “Record,” “Screenshot,” and “Broadcast.”
- To start recording your screen, either hit the “Record” button or simultaneously push the Windows + Alt + R keys on your keyboard.
- A timer will appear in the upper-right corner of your screen once the Xbox Game Bar begins recording the screen on your Surface Pro.
- Hit the “Stop” button or repeat the Windows + Alt + R keyboard shortcut to end the recording.
- The captured footage will be stored in your device’s “Videos” folder and within the “Captures” subfolder.
Here’s a video guide:
Screen Recording on Surface Pro With Screen Capture Online Recorder
It’s simple to record on Microsoft Surface Pro without any extra downloads or software – you can do it all online. With the online recorder, you can easily capture an entire video and more. You can seamlessly record both video and sound simultaneously.
With options to capture the framework sound, amplifier, or both — no action on your screen is left uncaptured. Additionally, you can record either fullscreen or just portions of your tablet’s display. This online tool ensures that whatever it needs to be captured gets captured easily.
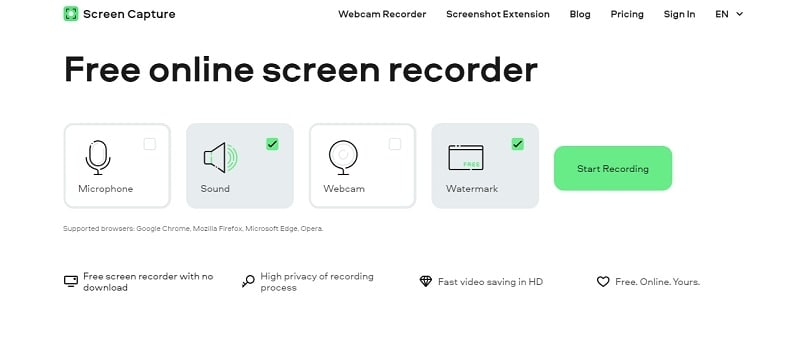
How to screen record with online recorder Screen Capture on Surface Pro
- Get started by heading over to the webpage of Screen Capture and clicking on the “Start Recording” button.
- Browse the options menu and hotkeys for pre-set recordings and output formats that can be easily customized to your desired settings. You may also select the system sound you want as an audio input source.
- Tailor your desired recording area. Fullscreen is available as well if you’d prefer that. Click “REC,” and the recording will commence promptly. You can also personalize your recorded file with visuals such as graphs, arrows, and texts while it’s being captured.
- When you are ready to finish recording, press the pause button. To continue recording, select the tick icon; if not, hit the cross icon and begin again. After taking a peek at your video clip, pick from seven different video formats or create an animated GIF–the choice is yours.
Screen Recording on Surface Pro With Microsoft Stream
Microsoft Stream is a powerful tool that allows you to effortlessly capture video recordings of team meetings or demonstration videos on your Surface Pro. It has smooth integration with other workplace applications, such as Sharepoint, and empowers you to quickly share all of your recorded footage with colleagues and teammates in no time.
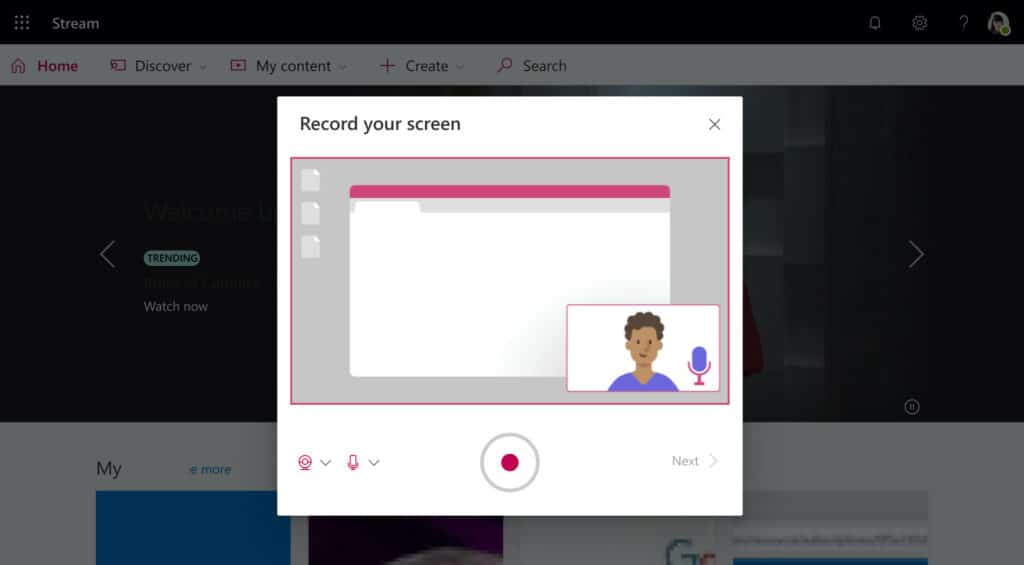
How to screen record with Microsoft Stream on Surface Pro
- First, open Microsoft Stream in your Surface Pro browser and sign-up/sign-in.
- Once logged in, click the “+” icon in the screen’s top right corner to start a new recording.
- From there, select “Record,” and you will be taken to the recording settings.
- Here, you can customize the resolution, audio input and output, and camera settings to your preference.
- When everything is set, press “Start” to capture your video.
- To pause or end the recording at any time, you can use the green bar on the top of the screen.
- When you have finished, click “Save” to complete the recording and save it to your Microsoft Stream account.
- To share your video with others, either use the “Share” button to copy the link or upload it directly to a website using the “Player” tab.
- Additionally, you can add comments, attachments, or tags to help others find and interact with your video more easily.
- That’s it! You have successfully created a new Microsoft Stream recording on your Surface Pro.
Screen Recording on Surface Pro With a Third-Party Recorder
The EaseUS RecExperts is a lightweight yet feature-rich program with all the features you need to record screen, audio, webcam, and gameplay easily. With its intuitive ecosystem, users can effortlessly select their preferred recording region or even take screenshots for later use — all at high quality.
Not only does this program provide you with the fundamental recording features that you need, but it also offers editing capabilities. The Auto Split function will divide your recordings based on a pre-set time or size. Additionally, after capturing your desired content, you can modify and edit it quickly.
How to screen record with EaseUS RecExperts on Surface Pro
- Download and get started with EaseUS RecExperts on your Surface Pro.
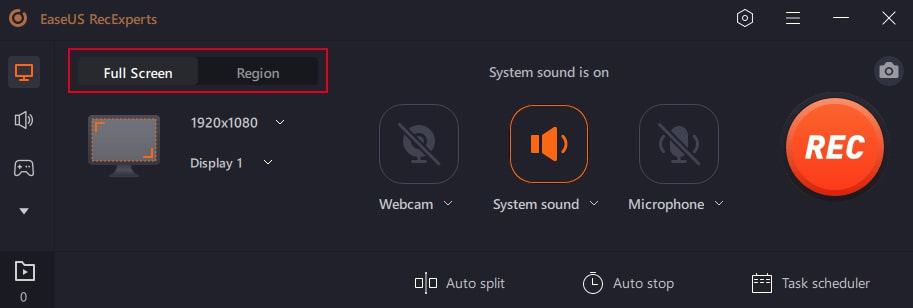
- After downloading, launch the app. You have two distinct recording modes to choose from: “Full Screen” captures the entire screen, while “Region” mode lets you manually select which area of your screen to record.
- After that, you can select from capturing your webcam footage, system sound, or microphone — whichever suits your needs. But if you only want a silent recording of the screen without any audio accompaniment, then simply turn off all three options.
- To begin recording, click the red “REC” button. You will then view a menu bar on your computer display. If you need to halt the recording at any point, press down on the white “Pause” icon and when you are ready to finish, tap on the vibrant red “Stop” tab.
- After you have completed your recording, you will be directed to the list of all recordings. Here, viewing and editing your recordings is simple and hassle-free.
Frequently Asked Questions
Now that you are aware of the amazing tools to capture videos on Microsoft Surface Pro, let’s dive into some other relevant questions related to this topic.
Does Windows 10 have screen recorder?
Yes, Windows 10 comes preloaded with the Xbox Game Bar feature that enables screen recording. It is an easy-to-use feature that users can use to record screen activity on their Surface Pro whenever they want.
How do I record my screen on my laptop?
To begin screen recording on your laptop, press the Windows Key + Alt + R. A little recording widget indicating your recording time shows up on the screen. Within that widget, you also have the option to stop the recording whenever you want.
How do I record my screen with my keyboard?
You can use the keyboard shortcut Windows Key + Alt + R on your Windows laptop to start screen recording.
What is the easiest way to screen record?
The easiest way to screen record is by using the Microsoft apps on your device. For example, you can use Xbox Game Bar or Microsoft Stream to screen capture any content you want easily.
Conclusion
We hope you are now sure of how to screen record on Surface Pro. In this guide, we listed 4 amazing solutions that come in super handy to record screen on Surface Pro. Of these tools, our top picks are the built-in software like Xbox Game Bar or Microsoft Stream, which offer flexible screen recording capabilities. However, if you want extra editing features and more within the screen recording app, then you can check out the online or third-party app we mentioned in the list.
If you’re seeking alternatives to the Surface Pro, our thorough comparison of iPad Pro is an essential read. With careful research into its features and advantages, we can assist you in making the perfect decision for your needs — Surface Pro vs iPad Pro: Which tablet is better for you?

Leave a Reply