

We all have been in that situation where you find something amazing and useful on the internet and you want to share it with your friends and loved ones, but there’s no share button, well the next best thing is – screenshot. Either it’s for some recipe you found online or your results at this amazing game you’re playing. It doesn’t matter because screenshot will for all the possible scenarios.
Let’s keep in mind there are multiple iPad devices – iPad Pro, iPad Air, iPad Mini, etc. There are some differentialities, but we will cover all of them. Also, there are multiple ways of taking a screenshot, we will also cover that.
How to take a screenshot on iPad Pro (2018 and 2020 model)
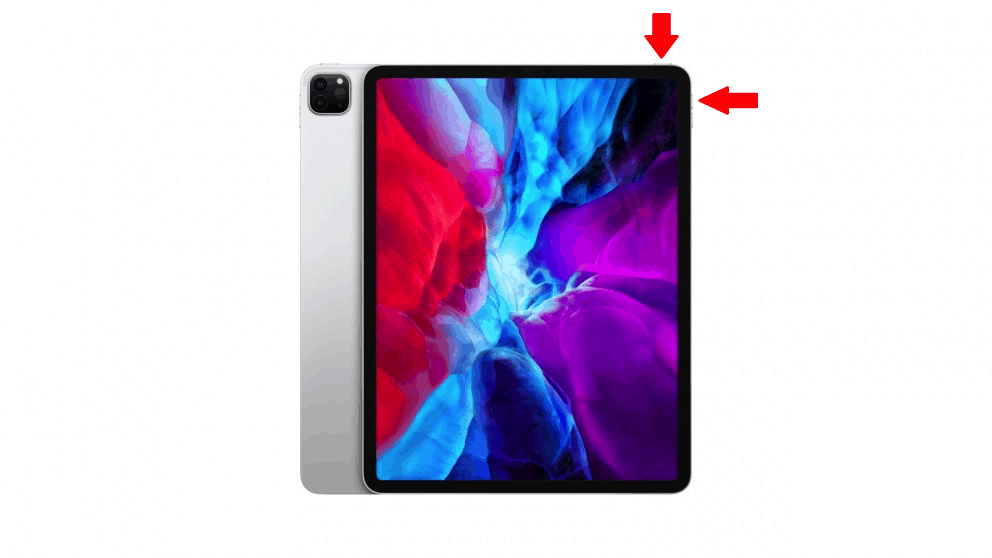
iPad Pro 2020 and iPad Pro 2018 when it comes to screenshots – it’s the same for both devices. The buttons also are located on identical spots.
Step 1:
Locate the Top Power button, which is directly at the top of your iPad at the right corner. And you also need to locate the volume up button. (Don’t confuse it with the volume down button) Which is located on the right side of your iPad. You can see that in the screenshot.
Step 2:
Press the power button and volume up button at the same time. You don’t need to hold them. You need to click them simultaneously. If you do this correctly your iPad Pro screen will flash instantly. You will also hear faint shutter noise if you don’t have your tablet on silence.
Where to find your screenshots on iPad Pro?
Once you have done Step 2 correctly and captured the screenshot your device will automatically save the screenshot directly to your camera roll in the Photos App. Simple click the Photo App ![]() and there you will have your screenshot and you will be able to view them and send them to anyone you want. Easy peasy, right?
and there you will have your screenshot and you will be able to view them and send them to anyone you want. Easy peasy, right?
How to take a screenshot on iPad Air and iPad Mini
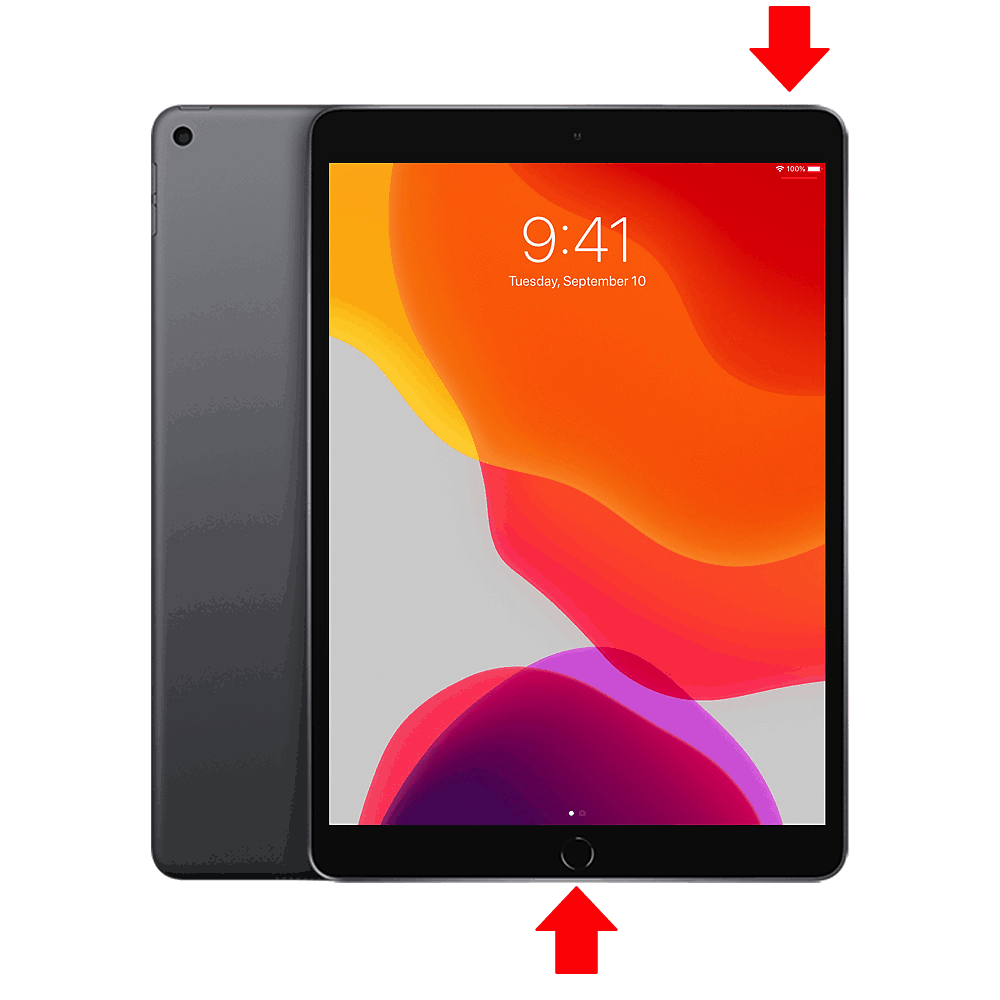
It’s a bit different than taking a screenshot on iPad Pro, because iPad Air and iPad Mini has a home button. You won’t need the volume button to capture a screenshot. It’s identical for both of the devices.
Step 1:
You will need two buttons. Home button and the power button at the top of your device. You can see both of the buttons pointed out in the screenshot.
Step 2:
Now that you located both of the buttons click them together. You don’t really need to hold them, just click them simultaneously. If you will do this correctly your iPad Air or iPad Mini screen will flash instantly. You will also hear faint shutter noise if your device isn’t in silent mode.
Once you have done this step correctly and captured the screenshot your device will automatically save the screenshot directly to your camera roll in the Photos App. Simple click the Photo App ![]() and there you will have your screenshot and you will be able to view them and send them to anyone you want. Couldn’t get any easier, right?
and there you will have your screenshot and you will be able to view them and send them to anyone you want. Couldn’t get any easier, right?
Is there another way how you can capture screenshots in case your buttons are broken or something? Yes, there’s also another way, let’s get into it.
How to capture a screenshot with Apple Pencil
Technologies evolve and their goal is to make our lives a bit easier. When you are drawing and taking notes, you don’t really want to put down your pencil in order to take a screenshot – that’s inconvenient. Now you can capture a screenshot with Apple Pencil which you can immediately edit with Markup tools before saving it or sending it over to someone.
- Place your Apple Pencil at the bottom left or right corner of the screen and draw the pencil toward the center (don’t remove the pencil from the glass)
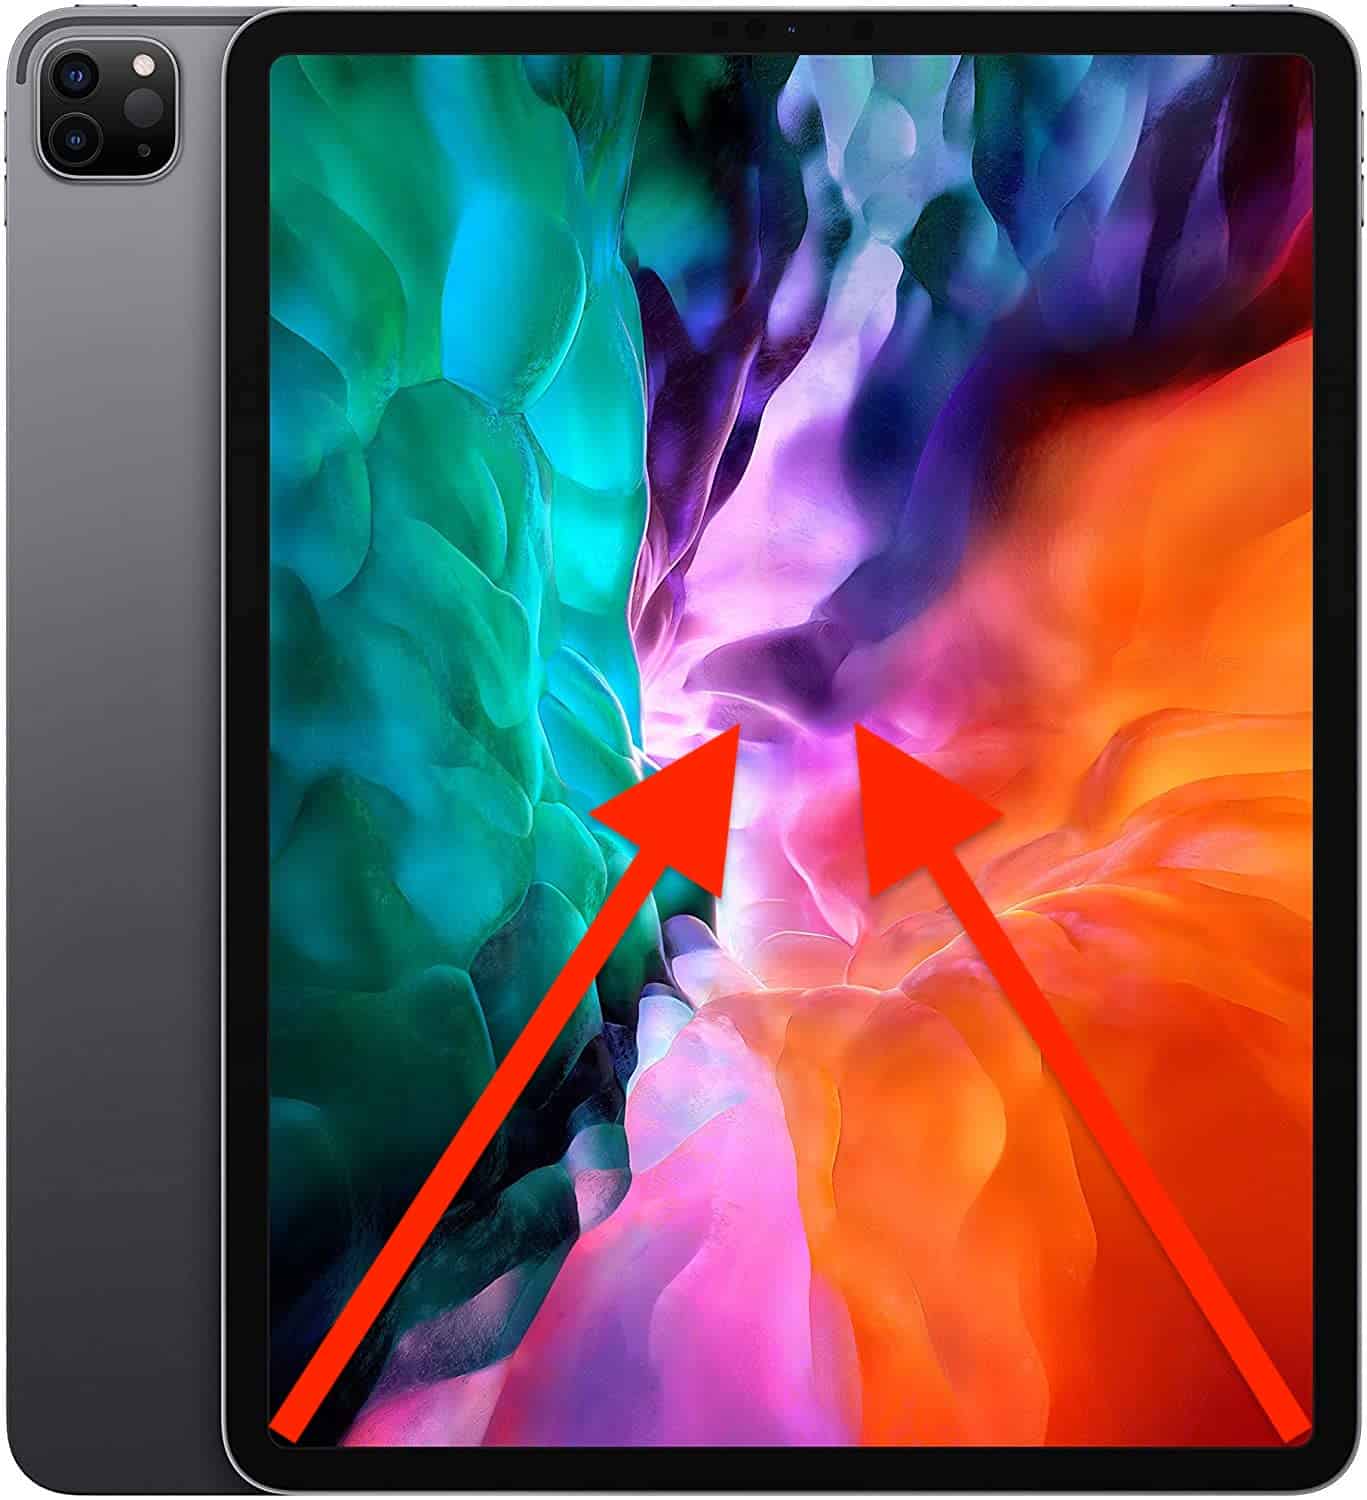
When this is done correctly it will automatically open Markup tools. Where you can draw arrows, circles, make notes, highlight, etc.
How to capture a screenshot on an iPad using AssistiveTouch
What is AssisiveTouch? It gives you the option to take a screenshot without specific button combinations. So if for some reason you’re not able to press multiple buttons at the same time or maybe just your buttons are not working – AssistiveTouch is the way how to capture the screenshot.
Now in order to do that you have to turn on Assistive Touch. Here are the steps.
Settings > General > Accessiblity > AssistiveTouch
Make sure you enabled AssistiveTouch. If it’s enabled a dot should appear on your screen which you can reposition.
Tap the Assistive Touch button > Device > More > Tap screenshot
Your device will automatically capture the screenshot. It will flash for a moment and make a faint shutter noise exactly as if you would have taken the screenshot with the buttons.
Once you have done this and captured the screenshot your device will automatically save the screenshot directly to your camera roll in the Photos App. Simple click the Photo App ![]() and there you will find your captured screenshots.
and there you will find your captured screenshots.
If this was not clear – here’s a youtube video that will explain and show you first hand on how to capture a screenshot on your iPad using Assistive Touch
I hope this article helped you capture the moment. If there are some questions, please, drop us a comment below. Have a great day.
Relevant reading:
How to edit screenshot with Instant Markup
When you take a screenshot on iPad Pro it will appear at the bottom left corner of your screen, it will be there for a few seconds before fading away. During that time you have the option to click/tap on it to open up Markup mode. If you used Apple Pencil in order to take a screenshot the Markup mode will be opened instantly. In case you missed it: Open your screenshot > Click edit > Click three dots at the top right corner > Markup.
Markup features
- Drawing on your screenshot: You’re able to pick among the available pencil shapes, change their colors, and changed their size. It’s used to pinpoint something out, to highlight something, and to make notes.
- Signature: You have the option to create your signature while editing the photo or you can create it before in the setting.
- Text field: You can add a layer of text to your screenshot, which can be a note. If you’re planning to write a long note, this comes in handy. Saves space.
- Ruler: To change the angle of the ruler, touch and hold the ruler with both of your fingers and rotate them as needed. To make it disappear, click on the ruler tool again.
- Eraser: Makes it easy to delete all your notes, drawings, shapes, highlights.
- Selection tool: You can use it to circle around your notes/marks/highlights/symbols to drag them to a different place.
- Shapes: You can add particular shapes to your screenshot (we like to use arrows :)) arrows, squares, circles.
- Magnifier: You can zoom in to a particular area. You can change the size and zoom percentage with your fingers. Makes it easier to point out something not so obvious.
Also, since you’re here, you might be interested in one of the best screen recorder apps for tablets called mSpy, check it out HERE.
You also might be interested in some of our other articles:
Leave a Reply