Splitting the screen on a Chromebook can be a great way to multitask and make the most of your device. It’s handy for researching two topics at once or having two programs open side-by-side. Fortunately, it’s very simple and requires only a few steps. This blog post will discuss how to split screen on Chromebook and maximize your productivity.
How to Split Screen on Chromebook
If you’re trying to figure out how to split screen on a Chromebook, it’s easy. Follow the steps below for Chrome OS:
- Launch a Chrome window and any app to begin.
- Next, click and hold the Maximize/Restore button in its upper-right corner.
- Now, click on the window and drag your cursor to the side of the screen where you’d like to position the Chrome window/app.
- Release the mouse.
- Repeat the same process for a second window, and you’ll be multitasking in no time!
Using Split Screen on Your Chromebook
To make multitasking simpler and less chaotic, Google has incorporated a split-screen mode into ChromeOS (which is what Chromebooks run). And there are many ways to do it! Below we show you how you can activate this convenient feature in four different ways.
Using drag and drop to split screen on Chromebook
Doing a split-screen on a Chromebook gets a lot simpler when you just drag and drop the window into place.
- Open a new Chrome tab or application.
- Navigate your cursor to the menu bar located at the top of your screen.
- To move the window, simply click on it and drag it to your desired side.
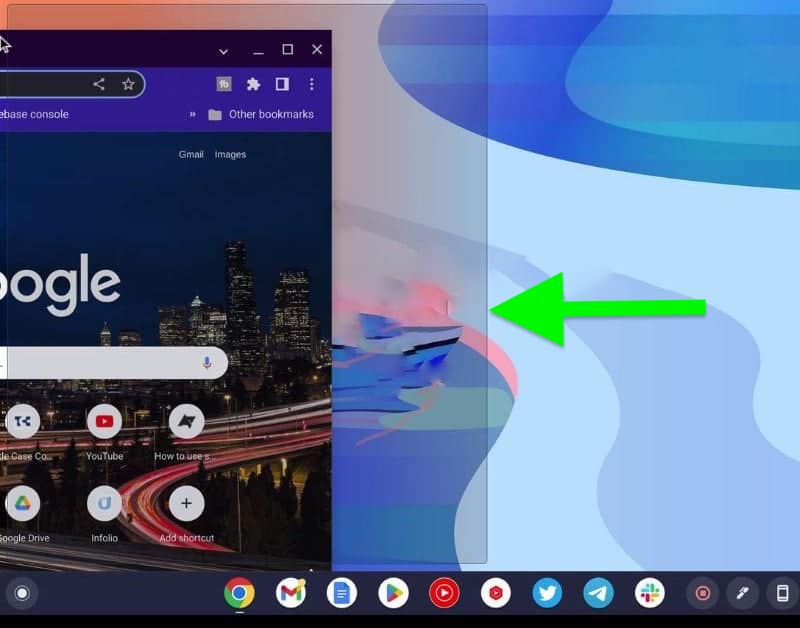
- When you’ve reached the desired side of the screen, simply let go of your mouse button to snap the window in place.
Using Keyboard shortcuts to enable split screen
Don’t want to rely on your mouse for split-screen activation? Fortunately, there’s a keyboard shortcut that makes it easy.
- Open a Chrome tab or an application.
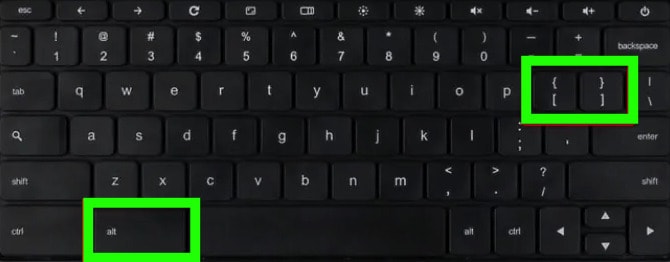
- On your keyboard, press “alt+[“ to place the current window on the left side of the screen or press “alt+]” to place the window on the right side.
How to use split screen mode on a Chromebook in tablet or tent mode
If you prefer using your Chromebook with touch controls, I have great news – you can still split screen! It can be a bit tricky to maneuver with your fingers at first, but it gets easier with practice. Here’s how:
- To start using a split screen feature, first ensure that split-screen is enabled (tap on the clock in the bottom right for the ChromeOS settings menu).
- Once that’s confirmed, you need to launch overview mode by swiping up and holding from the bottom.
- Now, you can simply tap and drag your app to either side — the window will snap once it’s near the edge.
- To adjust the size of your split-screen apps, touch the divider bar and wait for a moment until it becomes slightly wider.
- Move the bar to divide the screen into one-quarter/three-quarter layout or half-and-half layout.
- If the app you want isn’t visible in overview mode, just launch the app and then repeat this process.
- Once you have chosen your apps for split screen mode, you can use them at the same time.
Extension for Splitting Chrome Window on Chromebook
Using the Chrome extension to split screen on a Chromebook is perfect for instructors and presenters who require a dual view of their Google Meet/Zoom calls. Not only can they see the slideshow presentation, but they also have an eye on the participants’ faces in real-time!
The “Split Screen for Google Chrome” extension allows you to simply and quickly divide your browser windows into two sections, providing flexibility for adjusting the ratio of each window based on whatever works best for you.
- First, install the “Split Screen for Google Chrome” extension from the Chrome Web Store and pin it next to the address bar in the browser.
- Now, whenever you have multiple tabs open, click on the extension’s icon and click on the tabs you want to see side-by-side in split-screen mode.
- You can also choose the size of the split screen for respective tabs.
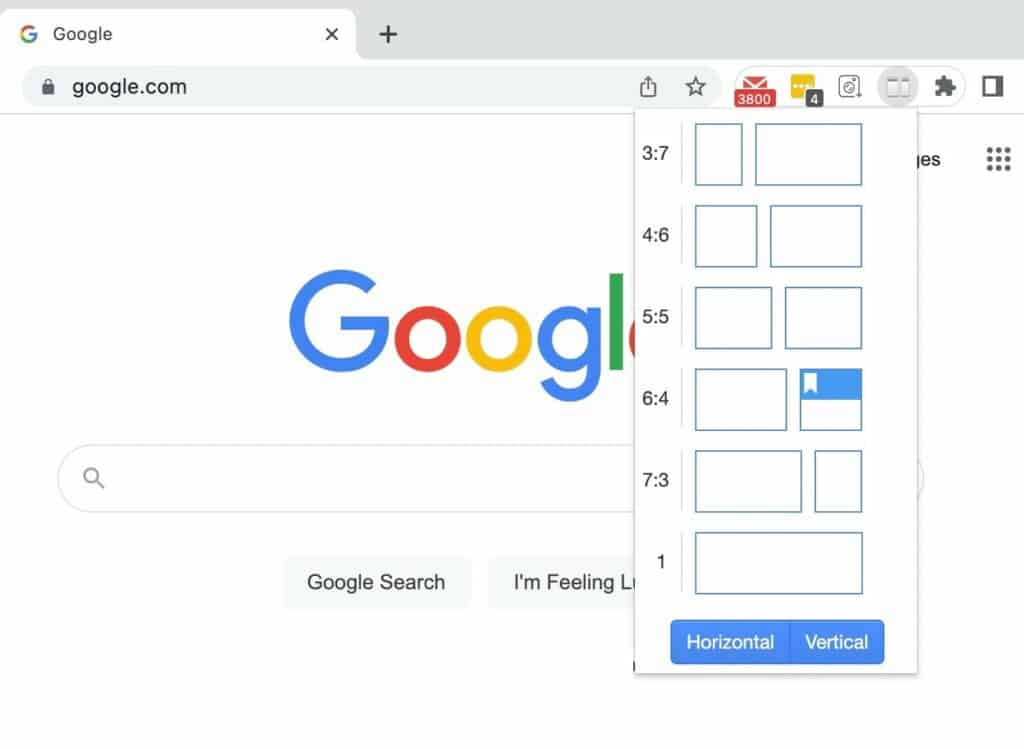
- Once you are done multitasking, click the extension icon again and end the split-screen view.
Looking for a new Chromebook? Read our buyer’s guide!
Exiting split-screen mode on Chromebook
When you’re done with your multitasking tasks, it’s time to switch back to a single window. There are different methods of accomplishing this goal. Let us show you all of them!
- Select the side of the split-screen you want to maximize.
- Now, take your cursor to the upper-right corner of the window and click on the Maximize/Restore button
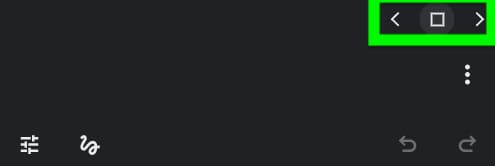
- Once you click it, the window will maximize and display on full screen.
Close split-screen mode via drag and drop
- Ensure that the window you want to maximize is your active one.
- Use your cursor to click, hold, and move the window to the topmost section of your screen.
- Let go of your mouse button once you have dragged the window to the top.
- As soon as you release your mouse, the window will maximize and you will exit split-screen mode.
End split-screen via keyboard shortcuts
- Select the window you want to make full-screen.
- On your keyboard, press “Alt+=” buttons simultaneously.
As soon as you press the buttons, the window will maximize and display on full screen.
Conclusion
Using a split screen on Chromebook is a great way to multitask and make the most of your device. With just a few clicks, you can have two windows open side by side so that both applications are visible at once.
We hope this guide helped you access the feature in various ways and in tablet mode. Remember that some apps may not support this feature, but as more developers update their programs with this capability, using multiple screens will become easier! Try it out today and see how much time you save when working with multiple windows simultaneously!

Leave a Reply