If you own a Chromebook, it’s absolutely essential that you keep your device up-to-date with the latest features and security safeguards. The good news is that all Chromebooks are updated the same way across manufacturers, so knowing how to check for updates and initiate them if they’re available isn’t as daunting of a task as one might think!
In this article, we’ll discuss why updating your Chromebook is important, how to make sure yours is always current, and exactly what steps need to be taken when initiating an update.
How to Update Chromebook
Updating your Chromebook is an easy process. Just follow the instructions below to easily update your Chromebook:
- Make sure your Chromebook is connected to a stable Wi-Fi network.
- Now, click on the “Time” option at the bottom of the screen and then click on “Settings.”
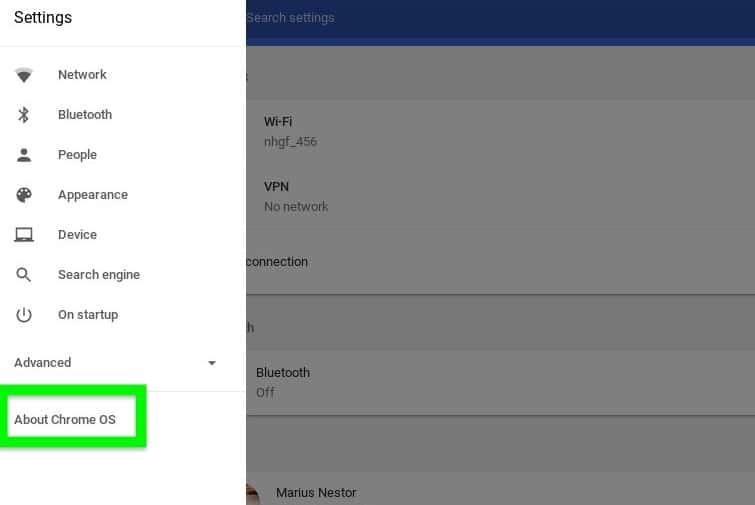
- In the bottom left corner, click on the “About Chrome OS” option.
- Check the version of your Chrome OS under “Google Chrome OS” and then click on the “Check for Updates” option to find if there are any new updates available.
- Wait for your Chromebook to run a check for available updates. If there’s an update, it will download it automatically, install it, then restart your device.
Updating Your Chromebook
Unless you’re looking to speed up the process, manually pushing an update for your Chromebook is unnecessary. Your Chromebook will update automatically and all that’s required from you when this occurs is a simple click on “Restart to Update” after being notified with an “Update Available.”
It’s truly that convenient! That said, if you wish to expedite the process, we have a simple method at our disposal.
Update Chrome OS to Beta or Dev Channel
Are you looking to try the newest yet-to-be-released features on your Chromebook? If so, then the Beta or Dev channel is where you should head. While these channels are known for their slightly buggy experiences, it’s an excellent way to get an early look at upcoming features.
However, keep in mind that if you ever want to switch back from either of those channels to Stable mode, all local data and applications will be wiped out. Nonetheless, here’s how one can transfer themselves into the Beta or Dev channel seamlessly:
- Locate and click on the cogwheel icon at the bottom right corner to access the “Quick Settings” panel.
- Select the “About ChromeOS” option in the left sidebar. Afterward, press “Additional Details” on the right panel.

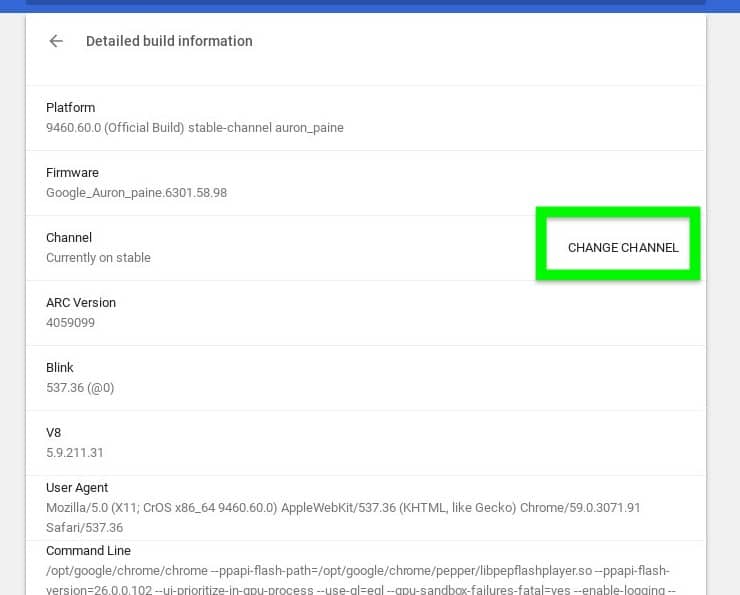
- On Chrome OS, you can view the current channel builds that your device is using; you need to click on the “Change Channel” option.

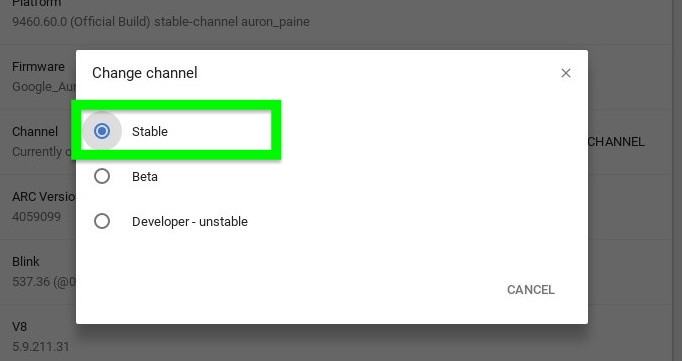
- Select either “Beta” or “Developer – unstable” from the pop-up window. For optimal performance, it is highly recommended to join the Beta channel as this version has fewer bugs and provides users with many fresh features.

- After that, revisit the “About ChromeOS” page and click on “Check for updates.” Your current channel choice should bring up a fresh update to download directly onto your Chromebook. Once you’ve done this, select “Restart” – voila! You’ll have effectively updated your device to its new channel version.
Troubleshooting Failed Update on Chromebook
If you experience technical difficulties and the system update fails to download, don’t fret! There are a few simple steps you can take to rectify your issue.
- Ensure your Chromebook is plugged into its charger and not in low-power mode.
- Restart your Chromebook before trying the update process.
- Make sure your internet connection is of high quality. If you are in a location with weak Wi-Fi signal strength, the update may not be able to download properly.
- If you’re having difficulty connecting your Chromebook to the internet through cellular internet, try switching over to Wi-Fi or an Ethernet cable for better results.
- Also, check the storage available on your Chromebook. If you find that the storage capacity is dangerously low, clear up some storage by deleting unwanted files and media. After clearing the storage, try installing the update again.
Why is it important to update your Chromebook?
It’s essential to keep your Chromebook up-to-date for several reasons. For starters, you’ll get the newest features and all their benefits. Every new release of ChromeOS brings a host of fresh improvements — some are obvious, while others take place in the background to ensure peak performance from your device.
Plus, if you don’t stay current on updates, then there’s a chance that some useful feature or enhancement could pass by without you even noticing.
By staying on top of device updates, you are guaranteed the newest and most effective protection against malicious hackers or malware. Hackers continuously attempt various tactics to steal your data — from exploiting ChromeOS bugs to enticing users into installing malware.
Fortunately for us all, each update Google releases addresses these weaknesses in our software security so we can browse with a sense of safety and assurance.
Frequently Asked Questions
Now that you know how to update your Chromebook, let’s answer some related questions.
Can you update an outdated Chromebook?
Older Chromebooks have hardware parts that eventually become outdated and are no longer supported by software updates. If your Chromebook is over 5 years old, you might see this message: “This device will no longer receive software updates. You can continue using your computer but should consider upgrading.”
Do Chromebooks automatically update Chrome?
Chromebooks come with the default auto-update settings. Ideally, it should do its job and keep updating your Chromebook automatically. If you feel your Chromebook has been updated for a long time, check for the update manually and re-visit the default auto-update setting.
How many years does a Chromebook last?
Generally, most Chromebooks can be expected to last between five and eight years. These devices will receive regular Chrome OS updates every four weeks for no less than five years from their release date.
How do I tell how old my Chromebook is?
To find your Chromebook’s Auto Update Expiration (AUE) date, first, click the three bars located in the top left corner of the page to open up the left navigation panel. At the bottom of this panel, you’ll see “About ChromeOS” click that and then select “Additional Details.” There you will have access to your AUE date!
Conclusion
Take advantage of the ease and convenience of having Chrome OS on your Chromebook – no need to worry about updating individual system components anymore! From drivers to Google Chrome updates or even Android container systems – it’s all taken care of by a single centralized update.
Keep your device safe and secure while running at optimum performance levels by regularly checking for new updates and swiftly installing them without fuss!
If you’re looking to spruce up the look of your Chromebook, check out our guide on updating wallpaper on Chromebook — Changing the Wallpaper on Chromebook – Step by Step Guide!

Leave a Reply