iPads have become an indispensable part of our lives. Many iPhone users buy the tablet to enjoy the large format version of the iPhone. Of course, it’s more than that, but the main reason people buy iPads is so they can watch movies, read the news, get work done, or simply browse the internet with the comfort of a larger display.
And all these activities can quickly lead to the “iPad Storage Full” message popping up on your screen. So how do you free up iPad space? Is it even possible? Will you have to lose data or buy a new drive?
To answer all your questions, keep reading our guide on how to free up space on iPad.
iPad Storage Full?
There are a few steps you can try if you find your iPad storage full:
- Our first recommendation would be to upload the photos and videos on your iPad to the iCloud drive to free up local disk space.
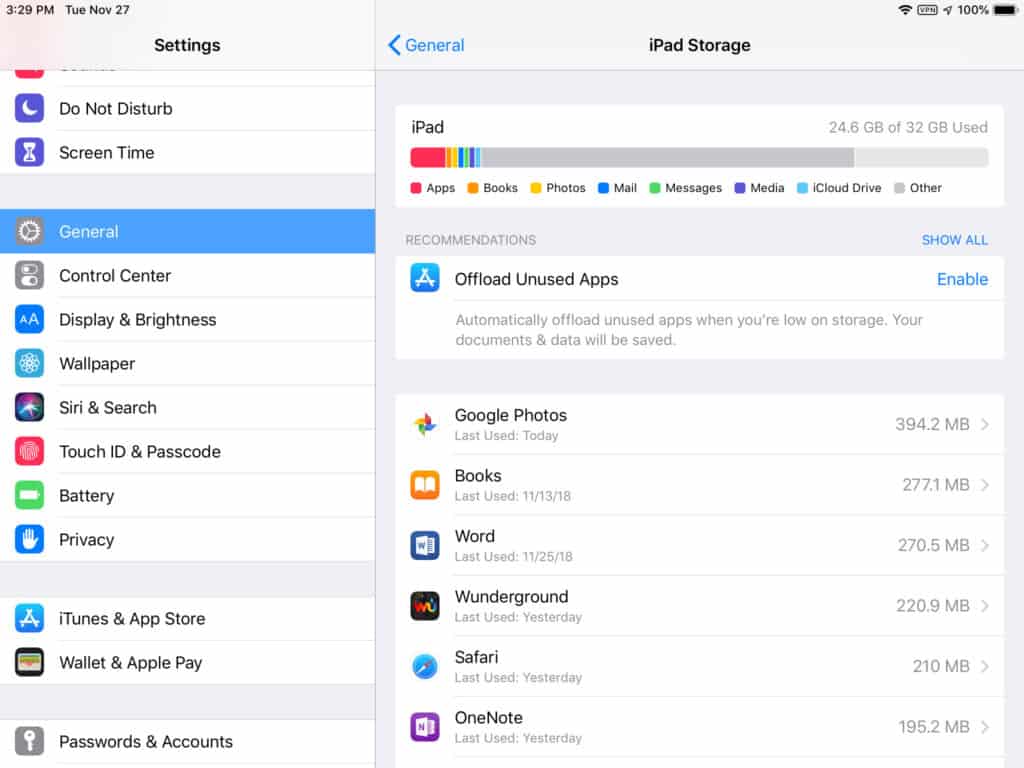
- The next step would be to review the largest videos on your iPad and see if you really want to keep them. You can check this by navigating to Settings > General > iPad Storage > Recommendations.
- Next, we recommend you delete all downloaded music on your phone and just stream songs using your mobile data.
- You can also free up iPad space by deleting any apps you don’t use regularly or no longer use.
Why Should You Free up iPad Space?
Well, you’re obviously here because you saw the “iPad Storage Full” message on your iPad, but on the off chance you’re not, we definitely want to emphasize the importance of not reaching this point. Packing your iPad storage full of data means that the device can no longer install important iPadOS updates, and those are frequent (and critical!).
Additionally, it’s also bad for your iPad, as it struggles to perform system functions normally. Your apps will have trouble storing data in the cache for temporary use. You will also notice the apps flounder to deliver the usual zippiness as full storage affects normal operation. Not to mention you will also see your iPad battery discharging quicker if you don’t free up iPad space regularly.
It will also stop you from being able to download new videos or images to your tablet. Additionally, you will be unable to install any new apps or shoot important videos or photos when you want to.
Keeping the iPad storage full also affects the life of your iPad.
How to Free up Space on iPad
So you bought an iPad with 128GB storage or more and are surprised to find that you keep getting pop-ups telling you that your iPad disk is full. Don’t worry; that happens to the best of us!
Contrary to what many users believe, simply buying a lot of disk space is not enough to ensure you don’t run into storage troubles — you still need to keep an eye on storage management. In fact, if you’re really good at managing files, even a 64GB iPad will suffice!
Considering how much time we spend online and the ever-increasing size of apps and the data they download, it’s only natural that iPad storage is used up so rapidly. So here are all the steps you can try to free up iPad space.
Move your data to iCloud or Dropbox
If you’re struggling with disk space issues, moving as many files as possible to cloud storage would be the most obvious solution. You have many excellent cloud storage options available, like Google Cloud, Dropbox, and Apple’s very own iCloud storage.
We recommend iCloud for many reasons — it’s built into your system, it’s not particularly expensive, it works well, and in our opinion, it’s the most secure cloud service of all. Besides storage, you also get various features, like iCloud Private Relay, Hide My Email, a custom email domain, and support for video storage for your HomeKit security cameras.
You can learn all about the features and pricing on Apple’s official iCloud page. For the US, it costs $0.99 for 50 GB, $2.99 for 200GB, and $9.99 for 2TB — these are charged monthly.
Once you purchase an iCloud plan, simply navigate to the Settings app and tap on your Apple ID right at the top. Then tap iCloud and then Photos. You can now hit the toggle switch to activate iCloud sync for your Photos app, which will also back up your videos.
Similarly, you can also toggle on the backup for iCloud Drive, which syncs files from the Files app. If you have any large files stored in there, you can then transfer these to iCloud Drive.
If you’d rather pick a third-party service like Dropbox, you will need to download the app, give it permission to access your files, and wait until all the gigabytes of data you’ve downloaded over the years are pushed up into the cloud.
You can learn all about Dropbox’s pricing and plans on its official site. You can go for a basic 2TB plan for $9.99 a month or go crazy and get yourself an enterprise account with custom pricing.
Move your photos and videos to your laptop or PC
Here’s a solution that won’t cost you any money. You can simply connect your iPad to your laptop or PC and transfer as many photos and videos as you like. Here’s how you do it.
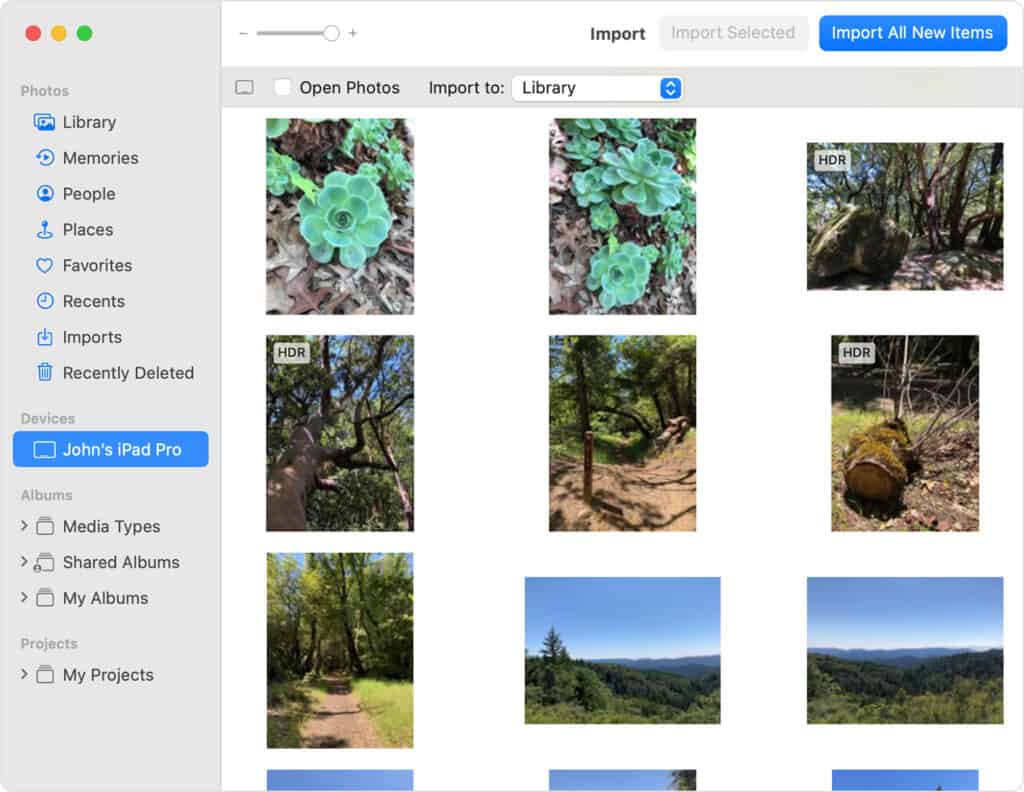
If you own a Mac, you can simply AirDrop large files directly to the computer as long as the iPad and Mac are on the same Wi-Fi network. Another option would be to connect your iPad to the Mac using a Lightning to USB cable. Here are the steps:
- Connect your iPad to your Mac. Also, ensure the screen is unlocked. If you see a prompt about connecting to a computer, go ahead and select ‘Trust This Computer.’
- Open the Photos app.
- You should now be able to see an Import screen — select the images and videos you wish to import and then hit the Import Selected button.
- That’s it! Your content is now backed up, and you can delete them from your iPad to free up storage space.
If you want to back up your iPad photos and video on a Windows PC:
- Connect your iPad to your Windows machine running the latest version of iTunes. Ensure the tablet is unlocked and if you see any prompts to trust the computer, just confirm it.
- Open the Photos app on your PC.
- From the menu, choose Import > From a USB device.
- Follow the on-screen instructions — you will be asked to choose the files to save and where to save them.
Once you save all the videos you want, you can delete them from your iPad. Word of warning — verify the files are backed up before you remove them from your iPad.
Delete music and movies
One way to rapidly regain disk space on your iPad is by deleting movies that you’ve downloaded. You can go through your Photos app, review each movie you’ve saved here, and decide whether you want to keep it.

Most movies easily take up a couple of GBs, so deleting 10-20 will quickly clear up anywhere between 20GB to 40GB. You should also go through your Disney or Netflix apps to review which movies you’ve downloaded and stored offline and delete any that you’ve already watched, or won’t watch anytime soon.
Similarly, there’s no need to download music to your iPad, as most of the time, you will be using a Wi-Fi connection to operate it. Even if you’re on mobile data, you can still stream music instead of saving them all on your device. Song libraries usually have hundreds, if not thousands, of songs — downloading all of them to your iPad can eat up your disk space.
The method of removing downloads is different for apps like Apple Music and Spotify. Nothing a quick Google search won’t solve!
Another culprit can be podcasts. Podcasts take up a ton of space. And be honest — you were NEVER going to listen to most of these anyway. Go ahead and delete them!
Delete apps you don’t use anymore
People love downloading apps; they also quickly forget about the uninteresting ones. So if you’re someone who loves trying out new games or apps that use AI to turn you into a green dragon with blue eyes, it might be time to review some of these as they take up a ton of space.
Swipe through your iPad until you see the apps screen and go through all your downloaded apps — delete any apps you don’t need. Remember, this not only deletes the app but also deletes the downloaded data and files stored in the cache. It’s a double win!
Change iMessage settings
If you love using your iPad to chat with your friends and family, you might have downloaded a lot of videos and images (we all love memes!) to your device. Considering how much people text each other these days, it’s no surprise that you’re running out of disk space.
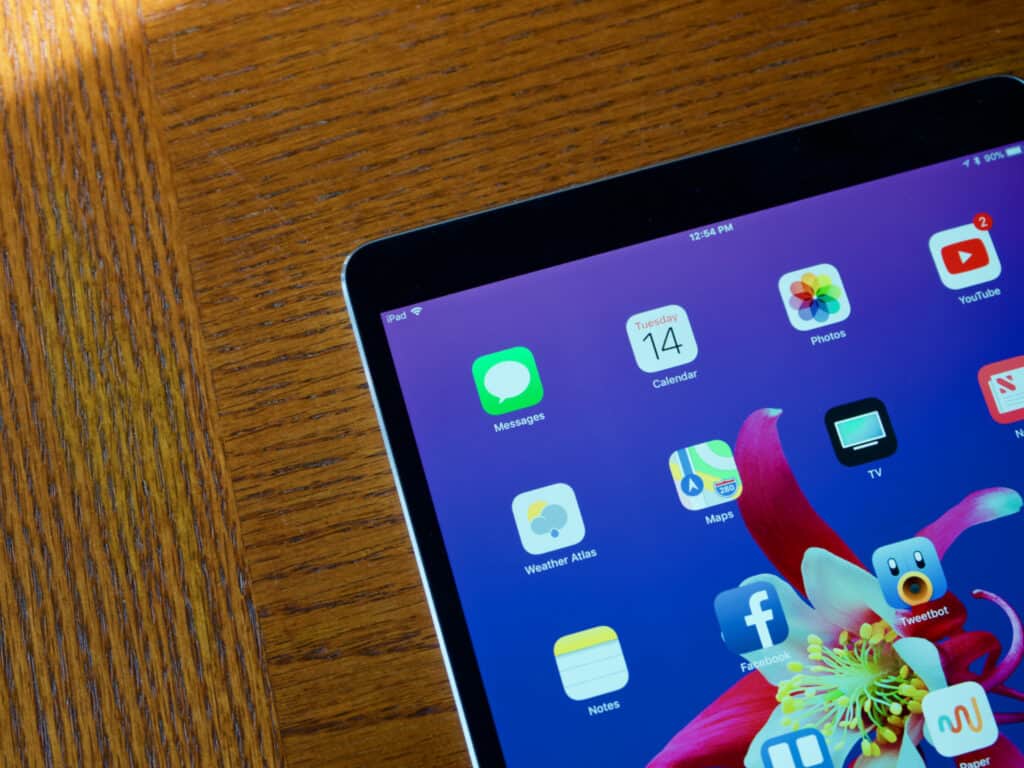
You have two options — either you can stick to chatting on your smartphone, or you can alter settings for the Messages app and have it delete all content that’s older than 30 days. We recommend the latter!
To do this, simply go to Settings > Messages > Keep Messages. Here, you can choose 30 Days, instead of the default 1 Year or Forever. If you scroll further, you can also set audio messages to expire in 30 days, and also toggle the Low Quality Image Mode (this lowers the quality of images that you share).
Offload apps (but keep the data)
If you go to Settings > General > iPad Storage, you can see how much space each app takes up.
Here, when you tap on an app, you see two options — Offload App, and Delete App. Offloading an app will delete the app but retain all the data. While it won’t exactly clean up your disk, offloading enough apps can create some extra disk space for you. We still recommend that you delete apps instead of offloading them.
Clear Safari, Mail, and Maps cache data
If you’ve never cleared the history on your iPad’s Safari browser, you might be in for a surprise when you do. Safari’s history cache can fill up quickly from all the surfing and downloading you do, so we recommend that you occasionally clear this. Note that this will clear any website logins and also cookies for different sites.
On your iPad, go to Settings and then tap Safari. Scroll until you see Clear History and Website Data. Tap this once, and you will be asked to confirm your action. Go ahead and do so.
There are some additional settings here that you should review. You will see an option called Automatically Save Offline with a toggle button next to it. Switch it off, as this will prevent the storage of random Safari articles on your iPad.

Another option, right at the top, is Downloads. You can choose between iCloud Drive and iPad — we recommend you change this to iCloud Drive, as storing downloads on your device will only take up more space.
Similarly, maps apps can take up precious disk space — this goes for both Google Maps and Apple Maps. Offline maps can take up a few gigs quite easily, so unless you spend a lot of time on such apps, go ahead and delete any maps stored locally on your iPad.
Review iPadOS recommendations
Once you’ve manually made all the suggestions we’ve recommended, you might want to review what iPadOS recommends. To do this, simply go to Settings > General > iPad Storage. Wait a minute while your iPad works to collect all the information about files stored on the disk. Once it does, you will see various options under Recommendations. Tap Show All so you can see them all.
You have options like Review Downloaded Videos and Review Large Attachments (in your Messages app), and also Offload App suggestions. Go through each of these carefully, and we’re confident that pretty soon, your iPad will be snappy again!
Frequently Asked Questions
What is taking up my iPad space?
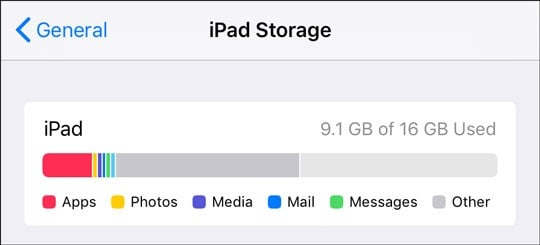
To know which files are taking up the most space on your iPad, navigate to Settings > General > iPad Storage. Wait a minute or two while data about your files is collected and compiled. A neat colored bar graph will show you what types of files are taking up the most space on your disk.
What should I delete when storage is full?
We suggest you simply back up photos and videos on your laptop or PC instead of deleting files. If you don’t care much about saving files, you can simply delete large videos or unused apps. Another way to free up iPad space is by clearing the cache memory for apps like Safari, Apple Maps, Google Maps, and Messages.
How do I free up space on my iPad without deleting photos?
One method would be to back up the Photos to your iCloud drive and delete them from your iPad. You can also back up your photos to your computer. If you don’t wish to delete photos at all, we suggest you go to Settings > General > iPad Storage and review the recommendations there. iPadOS will tell you what the biggest files are, and you can then decide if you want to delete them.
Conclusion
We hope our article helped you figure out how to free up space on iPads. It can be annoying to repeatedly see “iPad Storage Full” error messages, but as you can see, it’s fairly simple to free up iPad space.
If you have any more questions about the methods above, please leave us a message below!

Leave a Reply