

It can be frustrating if your iPad won’t connect to WiFi because most things you do on the iPad require internet access. Even games and streaming apps require you to go online, so this is an issue you should address immediately. There are a few reasons why your iPad could be misbehaving — it might have to do with your network settings, your iPadOS software, or even your internet connection itself. Keep reading to know how you can get your iPad working again.
iPad Won’t Connect to WiFi
One fix that you can try if your iPad won’t connect to WiFi is to reset your Network Settings. You can do this by going to Settings > General > Transfer or Reset iPad > Reset, where you then have to select Reset Network Settings. Once you do this, set up your iPad’s Wi-Fi connection again and try connecting to WiFi. You can also try restarting your iPad and also resetting your router.
iPad Won’t Connect to WiFi: How to Fix
We’ve included several fixes that you can try to get your iPad connected to the WiFi network once again. Let’s start with simple, obvious steps before moving on to slightly more complex ones.
Toggle WiFi on and off
If you haven’t already tried this, switching off your iPad’s WiFi connection and turning it back on would be step one. There are a couple of ways to do this; you can either do it from the Control Center or the Settings app.
Let’s try the Control Center method first, which is much simpler. Simply swipe down from the top right corner of your iPad screen, and you will see the WiFi symbol lit up in blue. Tap this, and it should switch off. Wait about 10 seconds, and then tap it again. It should then connect to your home or office WiFi network. Now open up a browser and visit a website to see if this worked.
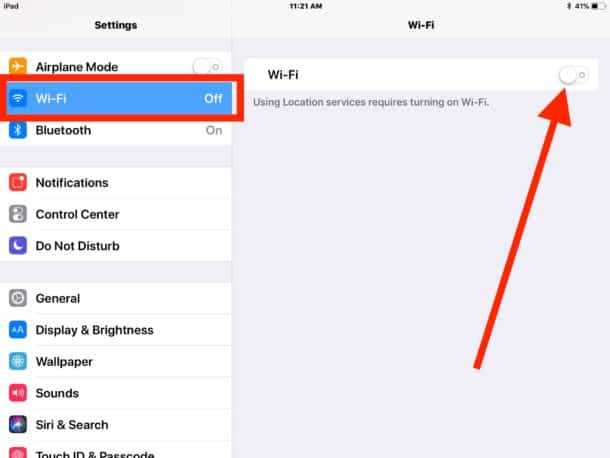
To switch off the WiFi connection from Settings, open up the Settings app, and right at the top, you should see Wi-Fi listed along with your network name (a good time to confirm that it is an active connection). Tap that and on the next screen, tap the toggle button to switch off your WiFi. Now wait about ten seconds, and then toggle it back on. Now try going online.
Check internet cables and connections
If you still can’t get your iPad’s WiFi connection working, look at the internet connection itself. Connect a different device to it and test if the connection is active. If no other device is available, try checking the lights on your modem or router to confirm that the connection is active — typically, you have LED lights on networking devices that tell you the status of your connection. Try connecting to a different WiFi network with your iPad, if possible.
Restart router
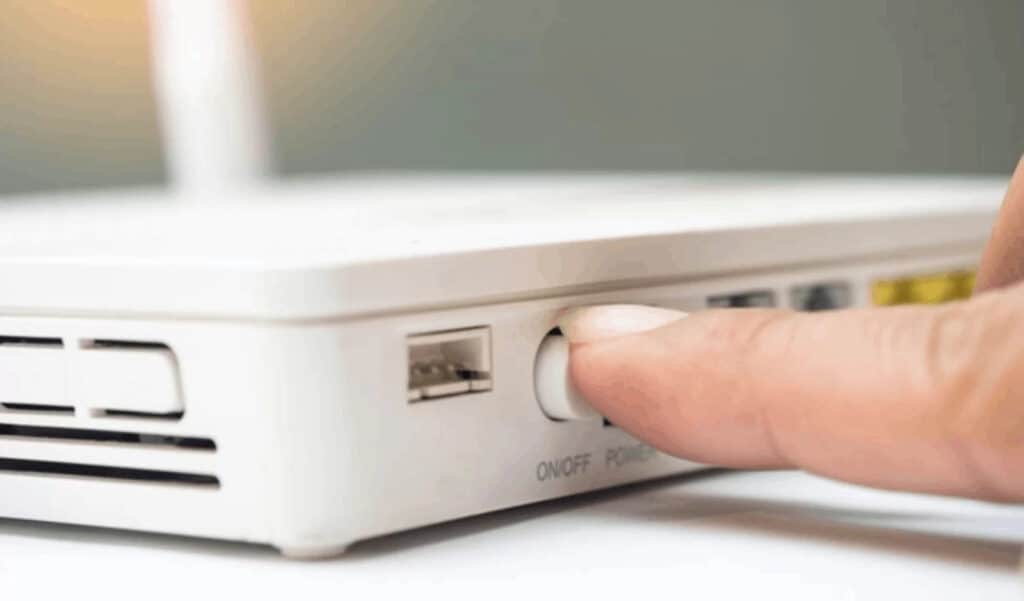
If you’ve confirmed that your broadband connection is fine, it could be a router problem. Go ahead and power it off, wait a few seconds, and then power it back on. Once you see the lights on it, give it a few minutes so that it can establish a connection with your ISP (internet service provider) and log you in. Once this is done, try connecting with your iPad again. It’s also a good idea to test the connection with your smartphone before you try connecting with the iPad.
Restart iPad
Restarting your iPad is a good idea at this point. Rebooting the tablet kills off some services that might be causing issues with your WiFi connection, so we’re hoping a restart fixes it. To restart your iPad, simply press and hold the power button and either volume key simultaneously until the power off slider appears. If you have an older iPad with a Home button, simply press and hold the power button.
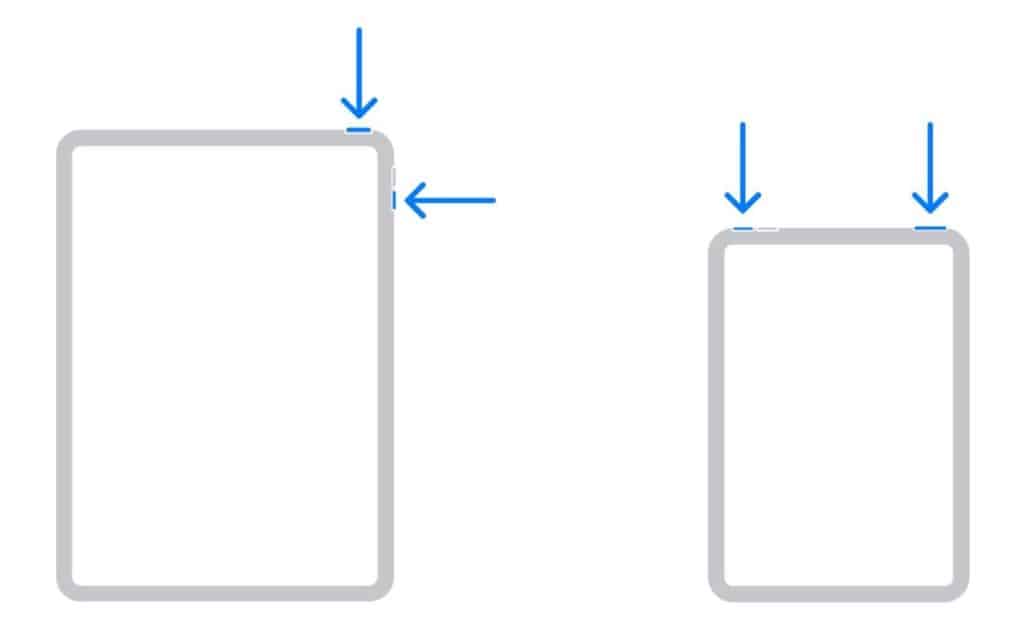

Once your iPad powers off, wait a minute before you power it back on. You can do this by pressing and holding the power button until the Apple logo appears on the screen.
Forget the WiFi network and then reconnect
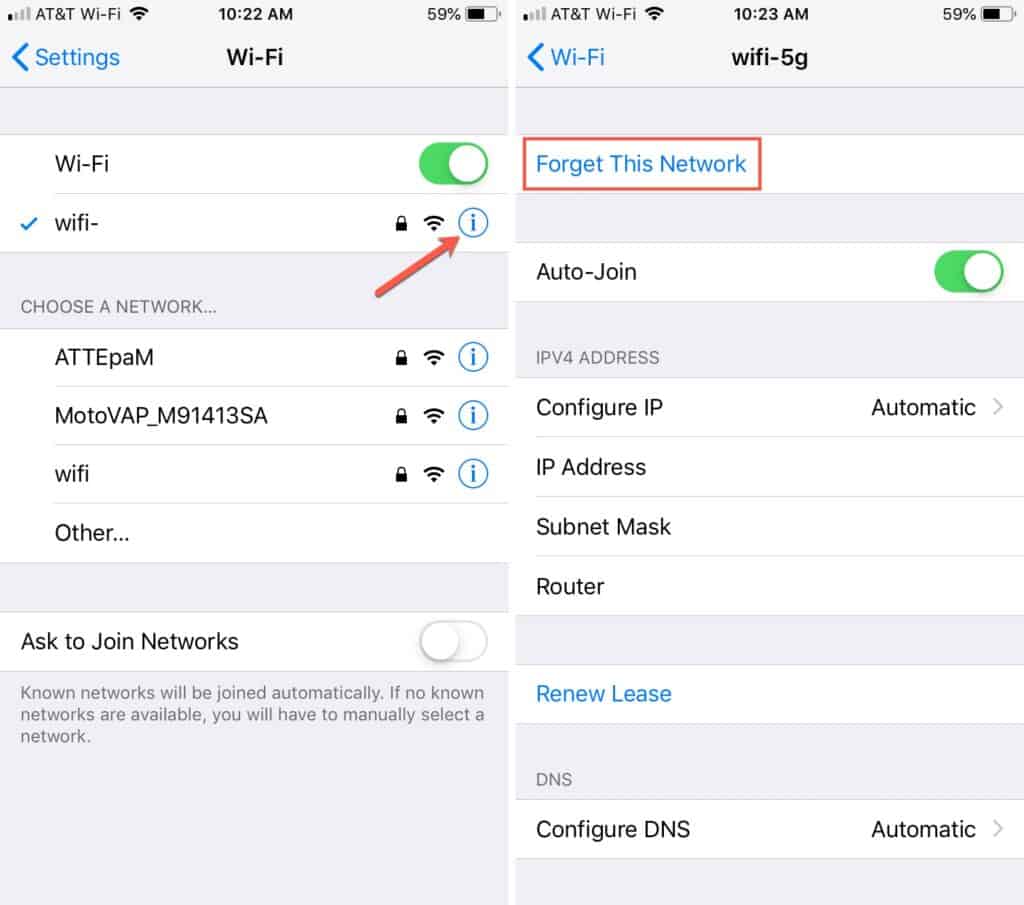
When you add your WiFi network details to your iPad, it saves all kinds of information regarding your connection. Removing this information may be able to fix your WiFi problem, so let’s try it. To make your iPad forget a network, first go to Settings > WiFi. Here you will see your network name with a checkmark next to it and an ‘i’ with a circle around it (this icon represents ‘information’).
Tap the icon, and on the next page, you will see details regarding your WiFi connection. Tap ‘Forget This Network.’ You will be asked to confirm your action, so proceed by tapping ‘Forget.’ Once your WiFi connection is removed from your iPad, go back to the WiFi page in your Settings menu and look for your network (it should appear under Networks). Tap it, enter your WiFi password, and join the network. Now test your iPad to see if it can connect to the internet.
Reset iPad’s network settings
If forgetting your WiFi connection issue did not work, it may be a deeper issue with your general network settings. Thankfully, your iPad allows you to reset this. Note that removing your network settings removes all WiFi information and information regarding other devices such as Bluetooth speakers and earbuds. You will have to configure these devices to work with your iPad later.
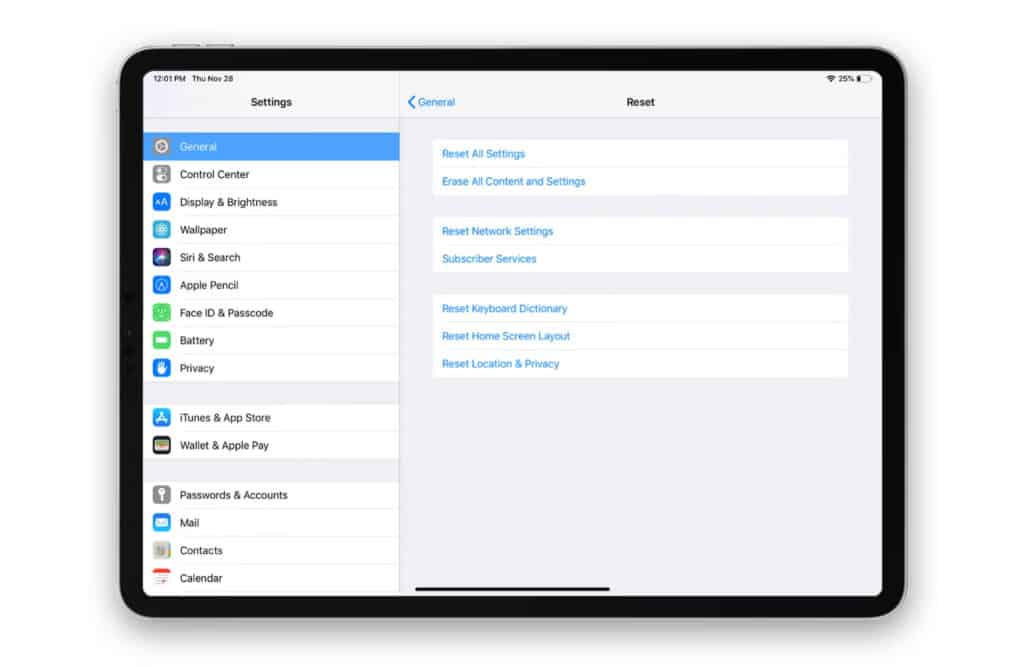
First, open your Settings app and go to General to reset network settings. Scroll down until you see Transfer or Reset iPad. Select it, and on the next page, select Reset. You will now see a list of options, but you must only tap Reset Network Settings, which is option 2. You will need to enter your passcode to confirm the action. Once this is done, add your WiFi connection once again, as you did in the earlier step. Now test your iPad once again!
If you’d like to learn more about resetting your iPad, read this article we wrote!
Turn off VPN
If you use a VPN (Virtual Private Network) to visit specific websites or access work-related networks and apps, we recommend you turn it off to see if you can access your WiFi connection. VPNs use complex software to protect your sensitive data, and there’s a slight chance this may interfere with the normal functioning of your internet connection. Definitely worth a try!
Backup your iPad
If you’ve tried all the above hacks and your problem remains, we recommend you backup your data as soon as you can. With your WiFi disabled, you will have to back it up using iTunes or Finder, depending on whether you use a PC or Mac. Unless you have a cellular+WiFi iPad, in which case you can back up using iCloud.
Backup via iCloud
This method can use up a massive chunk of your data plan, as backup files are typically massive. However, if you back up your data regularly, this won’t be an issue as only newer files will be uploaded.
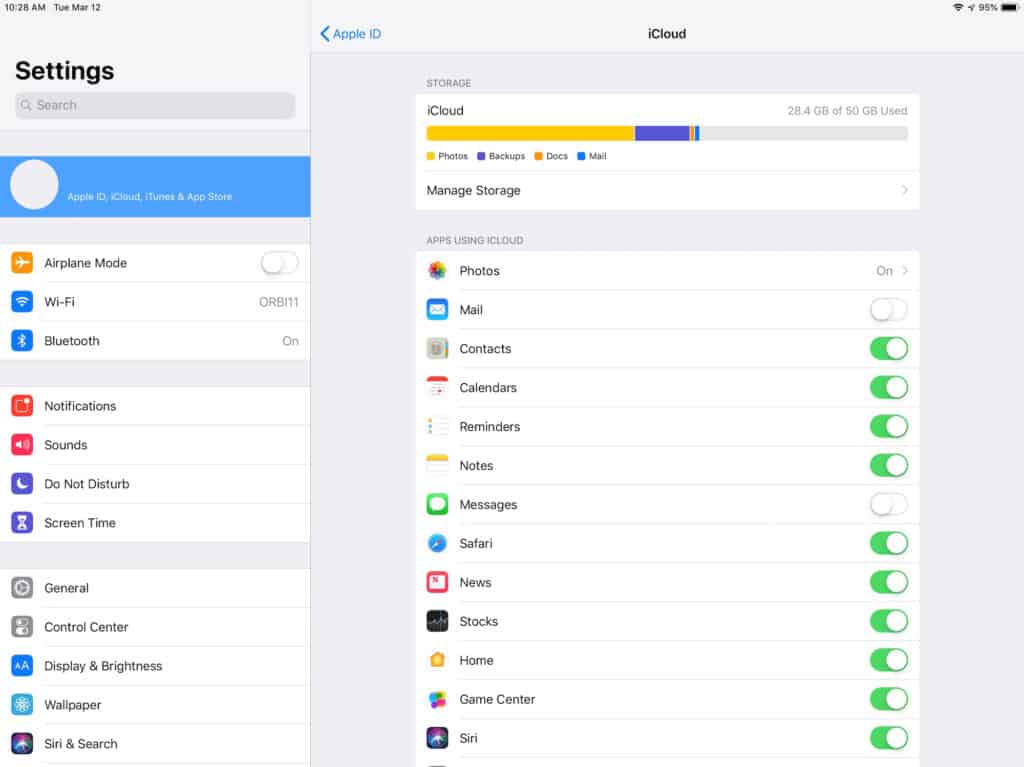
To back up to iCloud, open Settings > Your Apple ID > iCloud. Here, you will see Manage Storage — go ahead and tap it. Here, you can now select everything that you wish to back up, and you will also see how much cloud storage you have left and how much space is taken up by various apps and their data. You can delete anything you don’t wish to save.
Backup to PC via iTunes
To back up your iPad, connect your iPad to your PC with a cable, and open up the iTunes software if it does not pop up automatically. You should be able to see the iPad icon, so click that. Next, under the section named Backups, click on ‘This Computer’ and then tap Backup Now. Your iPad will now be safely backed up on your PC.
Backup to Mac via Finder
iTunes has been discontinued on newer Macs, but this is a non-issue as you can back up your iPad using the Finder app. Connect your iPad to your Mac and once it appears under Locations in your Finder window, click on it. Next, click on Backup all of the data on your iPad to this Mac, and the process of backing up will begin. Once the backup is complete, you can disconnect your iPad.
While we’re on this topic, we’d like to plug an article we wrote about restoring your iPad without iTunes!
Update software
It’s best to keep your devices updated with the latest updates from Apple as these ensure stable operation and security when browsing the internet and using apps. Installing the newest updates could fix your WiFi problem, so here’s how you go about it.
Via iTunes
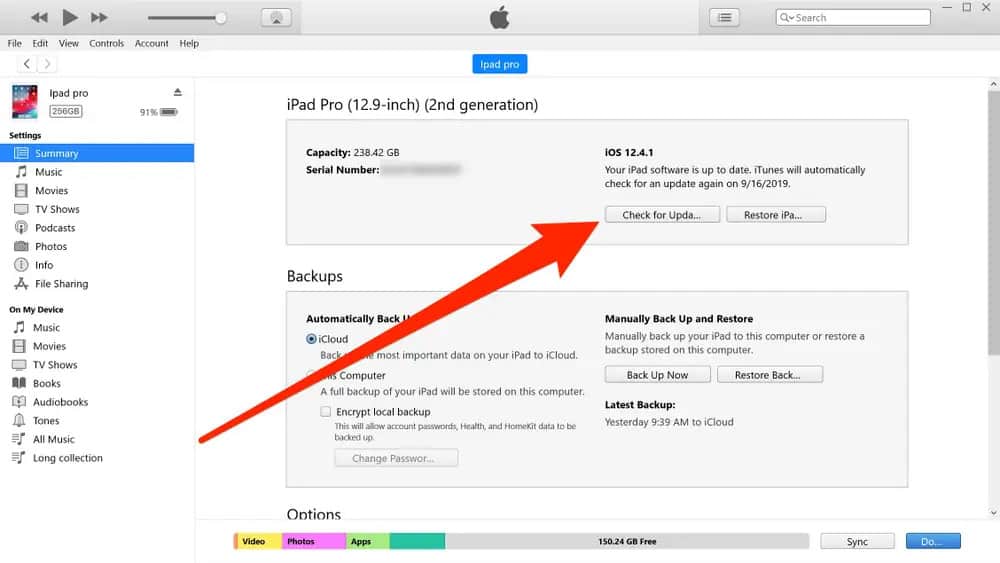
Connect your iPad to your PC and open up iTunes. Click on the iPad icon, look for Summary and click it. You should now be able to see an option called Check for Update. If any updates are available, they will appear here — we recommend you install them. The process is automatic, and once the updating is complete, your iPad will reboot. Try connecting to the WiFi network when it restarts.
Via Finder
Step one would be to connect your iPad to your Mac. Now open a Finder window and look for your iPad under Locations. Click on it, and then under the General tab, look for Check for Update. This will populate any available updates on your screen, so you should install them. Once the installation is complete, test your iPad to see if it can connect to your WiFi.
DFU restore iPad
Tough times call for tough measures, and it might be time to attempt a DFU, or Device Firmware Update restore procedure on your iPad. It sounds a lot scarier than it is, so don’t worry, because we will walk you through it! Depending on which iPad you own, pick a set of instructions below. Ensure you backup your iPad before you attempt this step.
DFU for iPads with Home button
- Connect your iPad to your Mac or PC.
- Next, open up a Finder window or your iTunes app, depending on what type of computer you own.
- Press and hold the power button and Home button on your iPad. Keep them pressed until the screen goes dark.
- Let go of the power button while you keep the Home button pressed.
- Wait until your iPad icon appears in iTunes or your Finder window.
- When it does, click on Restore iPad on your computer.
DFU for iPads without Home button
- First, connect your iPad to your PC or Mac using a cable.
- Next, open up iTunes on your PC, or a Finder window on your Mac, depending on which computer you’re using.
- Press and hold the Power button (the one on top).
- Keep the Power button pressed and after three seconds, press and hold the Volume Down button.
- Continue to hold the buttons for 10 seconds more.
- You can let go of the Power button, but keep the Volume Down key pressed for five more seconds.
- Wait until the iPad icon appears in iTunes or under Locations in your Finder window. When this happens, let go of the Volume Down button.
- On your computer, tape Restore iPad. That’s it!
Contact Apple Support
If all the above steps could not resolve your issue, it’s time to reach out to professional help from Apple. You can either contact them via getsupport.apple.com, or you can install the Apple Support app on your phone. You can also try the iPad support page on Apple.com.
Frequently Asked Questions
Why won’t my iPad connect to Wi-Fi but my iPhone will?
This could indicate network issues in your iPad, but there are a few steps that you could try, like restarting the WiFi connection on your iPad, restarting your iPad, resetting your network settings, and updating your iPadOS software.
Why can’t I connect to my Wi-Fi even though the password is correct?
There might be an issue with your network settings if you’re unable to connect to your WiFi network. You could reset it by going to Settings > General > Transfer or Reset iPad > Reset. Here, you can tap Reset All Network Settings, but note that this will remove all WiFi networks that are saved on your iPad and Bluetooth devices. Once it’s reset, simply set up the connection again on your iPad and see if it works.
Why is it not letting me connect to Wi-Fi?
If your iPad is not letting you connect to WiFi, it could indicate an issue with your network settings or your network itself. Try restarting your iPad and restarting your router. Next, try forgetting the WiFi network in General > WiFi > Network Name > Forget This Network, and set it up again.
How do I get my iPad connected to the Internet?
To connect your iPad to the internet, swipe down from the top right corner of your screen and long-press the WiFi icon. In the box that pops up, long-press the WiFi icon again, and now you should see a list of available networks. Tap on your WiFi network and enter the password, and you should be able to connect to the internet.
Conclusion
If your iPad won’t connect to WiFi, we’re pretty sure that one of the methods will definitely get it working properly again. Many users report that it’s usually the router causing issues, so you might want to start by resetting your router. If a different step worked for you, we’d love to hear, so please drop a line in the comments below!
Leave a Reply