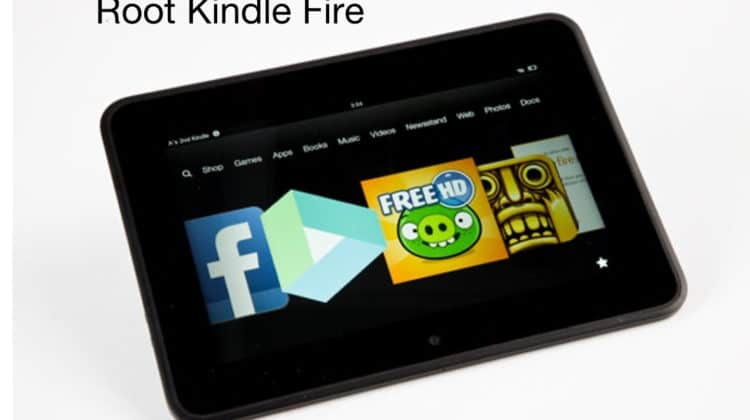
Many Kindle Fire users are interested in learning how to root Kindle Fire. The driving force behind the curiosity is to get complete control over their device and have the option to run third-party apps, remove pre-installed applications, and allow more customization options. While rooting can be a daunting task, this guide will show you how to easily root Kindle Fire.
Root Kindle Fire: How To
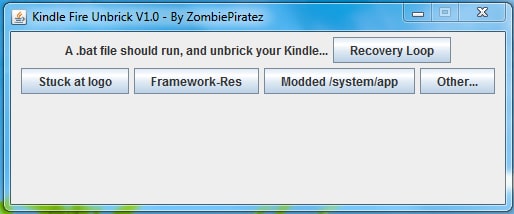
Rooting is a complex process. If you do not have enough experience installing drivers and extracting files, we suggest practicing extreme caution as you might just brick your device.
Let’s look at the prerequisites before we get into the specifics of rooting the Kindle Fire HD. After gaining root access, you will be able to modify your device and perhaps even install applications from the Google Play store. However, you should be aware that rooting your device may void its warranty and prevent you from being able to obtain subsequent firmware updates.
How to root Kindle Fire: The Pre-Requisites
Before learning how to root Kindle Fire, please ensure that the following conditions are met:
- If you want to root your Kindle Fire HD, you’ll need a functional Windows PC.
- Charge your gadget to at least 85% before using it.
- You should also ensure your computer has the required Kindle drivers installed before using the device.
- Install the Fire or ADB drivers, whichever you prefer.
- The “Allow Installation of Applications” option should be set to “on.”
- Now go to Settings > More > Device and toggle it on.
- You need to enable the “Show hidden files, folders and drives” option on your Windows system. To get to the utility files, use this method.
- The Android SDK must be downloaded and installed before you may use ADB drivers to root your phone. Getting started is as simple as going to this page on the Android Developer website.
- Before you root your device, make sure you have a backup of your data.
- Your Kindle Fire’s Utility application and ADB drivers are now installed and ready for use in the rooting process. Let’s do it using a linear approach.

Also Read: Kindle Fire Won’t Turn On
Steps to root Kindle Fire using ADB
You can quickly root your Kindle Fire using ADB (Android Debug Bridge) drivers if you’ve completed the steps outlined above. Rooting is a simple procedure that requires only a few simple steps.
- Get the ADB option to work on your device. Activate the “Enable ADB” option by going to Settings > Device > activate Enable ADB option.
- Now, download the ADB Drivers for Kindle Fire. Extract the Kindle Fire ADB Drivers’ zipped folder to a convenient location on your PC.
- After the extraction, you will find a “Kindle Fire ADB drivers.exe” file. To begin the installation, click on the file. Complete the installation by agreeing to the terms and conditions. For the installation to be executed, you may be prompted to do a system reboot.
- Connect your Kindle Fire to your computer after it is rebooted.
- Look for “Android Composite ADB Interface” under “Kindle Fire” in Windows Device Manager. You may see a yellow indicator if it hasn’t been updated in a while. You’ll be prompted to do a quick interface upgrade.
- Download the automatic programmed file for your Kindle from here. Run the “runme.bat” file that you downloaded after unzipping. Automatically, the script will begin to execute. In a few cases, you may just need to press Enter.
- Just disconnect your Kindle when the script has been completed successfully. Go to the “Tools” section of any file explorer and see whether you’ve successfully rooted your device. The “Root Explorer” option is shown when you scroll down the page. It will be activated if you tap on it.
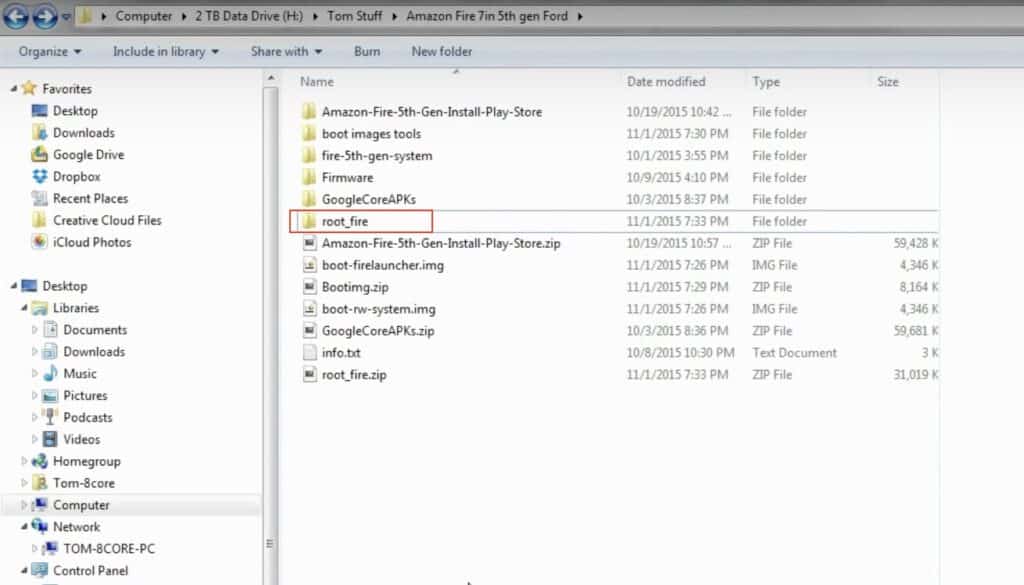
Here’s a video on How to Root the Amazon Fire 5th Gen 7 inch tablet:
You’ve now utilized ADB drivers to gain root access to your Kindle Fire. Let’s take a look at a different method to root Kindle Fire.
Steps to root Kindle Fire using Kindle Fire Utility
Follow these simple steps to root your Kindle Fire HD or any compatible device using Kindle Utility:
- Ensure that the Kindle Fire drivers are properly installed on your computer. You may get the “Kindle Fire Utility” for Windows here.
- Connect your Kindle to your computer by unzipping the file.
- Depending on your system, you may be asked to install extra drivers after connecting it. You can kickstart the installation process by double-clicking the “install drivers.bat” file on your computer. If you follow the on-screen directions, installing the necessary drivers may take a couple of minutes.

- You may use the “run.bat” file to see if the drivers are installed by clicking on the ADB status.
- You’ll be presented with a variety of choices on the screen. Rooting can be started by selecting “Install Permanent Root with Superuser” from the menu. Rooting your Kindle Fire will be done automatically after you pick that option. Wait patiently for the system to notify you that it has completely rooted your device. Avoid disconnecting your Kindle while you’re doing this.
- Google Play can also be installed on your device. Run the “run.bat” file again. Use the root features by clicking on the “Extras” option. The “Install Google Play Store” options are all you need to complete the process.
Kindle Fire HD and other Kindle Fire models can be successfully rooted by following the outlined steps.
Note: Even if you’ve tried to prevent automatic updates, Amazon may still be able to “unroot” your Kindle Fire by updating it. Connect your tablet to your PC and try to root it again using the Fire Utility if your device becomes unrooted.
Root Kindle Fire 1st Gen Without Computer
You can root Kindle Fire 1st gen without computer by using APKs (Android Package Kit) of apps like KingoRoot. Remember, APK apps are not the safest option, but go ahead if you are willing to take the risk to root Kindle Fire. You can download the APK from here.
- First, go to Settings on your Kindle Fire and then go to Security > Unknown sources. Allow downloading apps from unknown sources.
- After enabling APK downloads, you will be able to download the KingRoot APK.

- Download and install the app on your device.
- Now, open the app and tap “One-Click Root” option from the main screen.
- Wait for the app to root your device.
Root Kindle Fire: Benefits and Risks
Fire OS, which powers all Amazon tablets, is based on the Android operating system. To ensure that users don’t mistakenly disrupt their devices, developers limit access to certain functionalities and files.
When it comes to third-party applications, Amazon follows Apple’s lead by enforcing limits on its devices. When you “root” a device, you can do anything you want because you no longer have such limitations.
There are several advantages to rooting your Fire tablet. For instance:
- You can now use apps that you couldn’t use previously
- Delete any applications that came pre-installed on your computer
- Use an SD card to store apps that have been installed
- Get performance-enhancing custom ROMs
- Try out a new UI or operating system on your device
Rooting your Fire Tablet has several risks, including:
- You void the warranty, which means that you can no longer claim a warranty and use the perks
- You run the risk of “bricking” your gadget
- Your device might get prone to viruses and malware
- A bad impact on the performance level of your device
For these reasons, you should always make a backup of any crucial data. You can do this using Amazon Cloud Drive or downloading the data from your device to a computer.
Also Read: Google Play on Fire Tablet: Instructions and download links!
Kindle Fire Rooting Utilities
A Windows PC and a rooting tool like Amazon Fire Utility are required to root Kindle Fire. What you want to accomplish with the rooted Kindle Fire will determine which tool you should use. For example, you can choose from the following settings while using this tool:
- Disable Amazon’s automatic updates.
- Remove the ads from the notification bar.
- Delete any apps that came pre-installed on your device.
- Access Google applications like Google Photos, Google Play Store, and more.
- Reboot your device in recovery mode.
- Switch to a different launcher.
You may discover various rooting tools for your Fire tablet on the internet. Rootjunky’s Amazon Fire 5th Gen Super Tool is compatible with the latest Fire tablets and may be used to install custom ROMs and OS systems.
Always use a virus scanner on files you download on the internet before opening them, and only download from reliable places. Numerous free on-demand virus scanners are at your disposal. Read instructions that come with any software you use very attentively to know what each function performs. When using the Amazon Fire Utility to remove pre-installed apps, all apps get removed except for the Camera and Settings apps.
Frequently Asked Questions
Now that you know how to root Kindle Fire using different methods, it’s time to answer some related questions.
Can Kindle Fire be rooted?
Just like any other Android device, you can root Kindle Fire too. By rooting their Fire Kindle, the user gains access to previously unavailable apps.
How do I root an old Kindle Fire?
You can root your old Kindle Fire using Android Debug Bridge (ADB). You will have to download Fire Utility on your computer to root the device successfully.
How do I root and install Android on Kindle Fire?
You can root your Kindle using Android Debug Bridge and Fire Utility programs on your computer. After rooting the devices, you can install a custom Android ROM to use Android apps and even access the Play Store to download more apps.
How do I convert my Kindle Fire to Android?
You can convert your Kindle Fire to Android by rooting the device and installing a custom Android ROM. You can download Android apps and use the device as an Android device.
Conclusion
We hope this guide helps you in successfully rooting your Kindle Fire. It is no easy task to root Kindle Fire, and we made sure to help you out at every step. Let us know in the comments if you were able to root Kindle Fire using either of the methods.

Leave a Reply