Apple’s iPads, which can be purchased in many different screen sizes, continue to rule the tablet industry. The iPad Pro series, with cutting-edge hardware, is Apple’s top-tier tablet offering. In comparison, the iPad Air is more user-friendly and affordable.
For less tech-savvy consumers, Apple also offers the standard iPad lineup and the iPad mini. However, Apple’s iPads all operate on the iPad Operating System (now iPadOS 15), which is very similar to the iOS software found on iPhones. Despite changes to the user interface and app selection, the iPad is still a powerful tool for work. If you were wondering what to do with your new iPad or iPad Pro, keep reading!
What To Do First With Your New iPad
While the prospect of setting up a fresh new iPad may sound daunting, the process is fairly simple. Apple will guide you through the process, but don’t rush through the initialization steps. While it’s tempting to rush to install your favorite applications and games, doing so might lead to problems on the road, such as a loss of privacy, an overload of unnecessary alerts, or a malfunctioning device.
Here are twelve essentials to cross off your list while getting your iPad ready for action.
Move Data From the Old Device to Your iPad
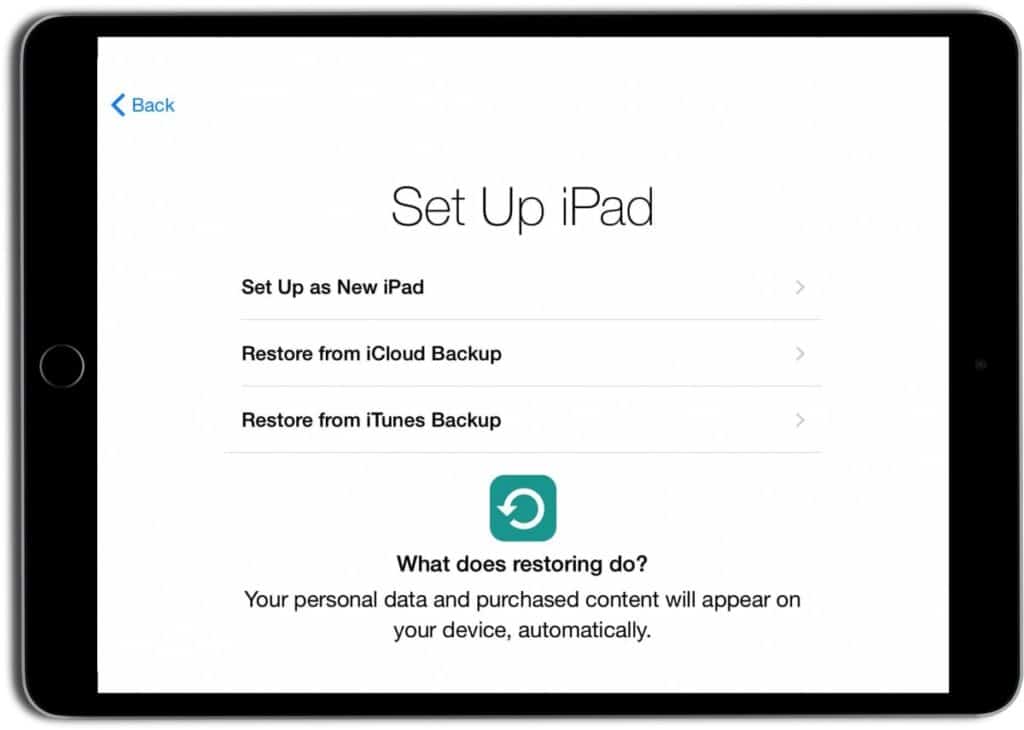
Apple may ask you whether or not you would want to move your applications and data to the new device during the first setup procedure. A couple of options exist for accomplishing this.
You can set up the iPad from scratch or restore it from a previous backup, thereby moving all of your data from the old iPad to the new one.
There are four choices:
- Set up your new iPad from scratch without backup
- Restore the backup from iCloud
- Restore from Apple iTunes or Finder backup
- Transfer data from the Android device
Setting up your iPad as new
You’ll be directed to the Apple ID setup page if you select ‘Setup as New.’ Once you’ve entered your Apple ID and password, you’ll be able to sign in using your Apple ID.
If you still don’t have an Apple ID or are starting over and need a new Apple ID, select the corresponding button and follow the on-screen instructions. Date of birth, full name, mailing address, and other personal information will be required.
Restore Backup from iCloud
Make sure you have a recent backup of your old iPad on either iCloud or iTunes. The iCloud backup is pretty efficient, and many Apple users rely on it. However, iTunes backup is still the fastest option.
Select Settings > iCloud > Storage and Backup from the old iPad’s menu, then locate the line that reads “Last Backup” near the bottom of the screen and tap it.
Restore Backup from iTunes
Connect your old iPad to your computer and launch iTunes if you want to use this method. To access the most recent backup, tap the iPad icon in the upper right corner. Click Back Up Now if it was a while ago.
If you’re using a Mac with the latest version of macOS, Catalina, you won’t have iTunes anymore. Finder takes over its duties, performing tasks nearly identical to iTunes.
Use iCloud or iTunes to restore
The Restore from iCloud/iTunes option requires you to log in using your Apple ID and password. When it’s done, a pop-up reading “Update Complete” will appear on the screen.
Transfer data from Android
For this method, you will need an app called Move to iOS, which you need to install on your Android tablet. Select Move Data From Android on your iPad and then follow the on-screen directions to upload your Android tablet’s information to iCloud.
Set Up Your Passwords or Touch ID
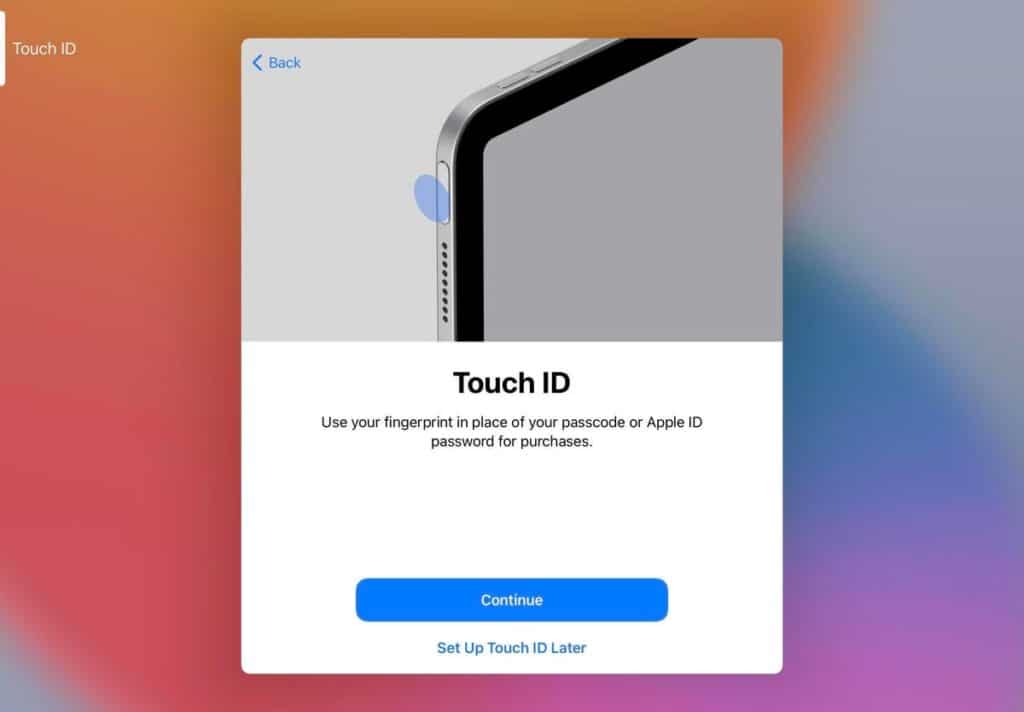
A passcode adds an extra layer of protection. However, it isn’t as secure as other methods. We think the advantages far exceed the annoyance of having to enter a passcode every time you turn on your iPad (or, based on your device, place your fingertip on the Touch ID sensor or flash your face right in front of the Face ID scanner).
But if you prefer convenience, you can choose Touch ID. After entering the passcode, you’ll be prompted to activate Touch ID during the setup process. Select one finger or thumb and tap it gently (but not forcefully) against the Home button. You can register additional fingerprints at a later time.
If you’re using a 2018 iPad Pro (and later Pro models), you won’t be prompted to set up Touch ID; Face ID will be used.
Set Up Find My iPad
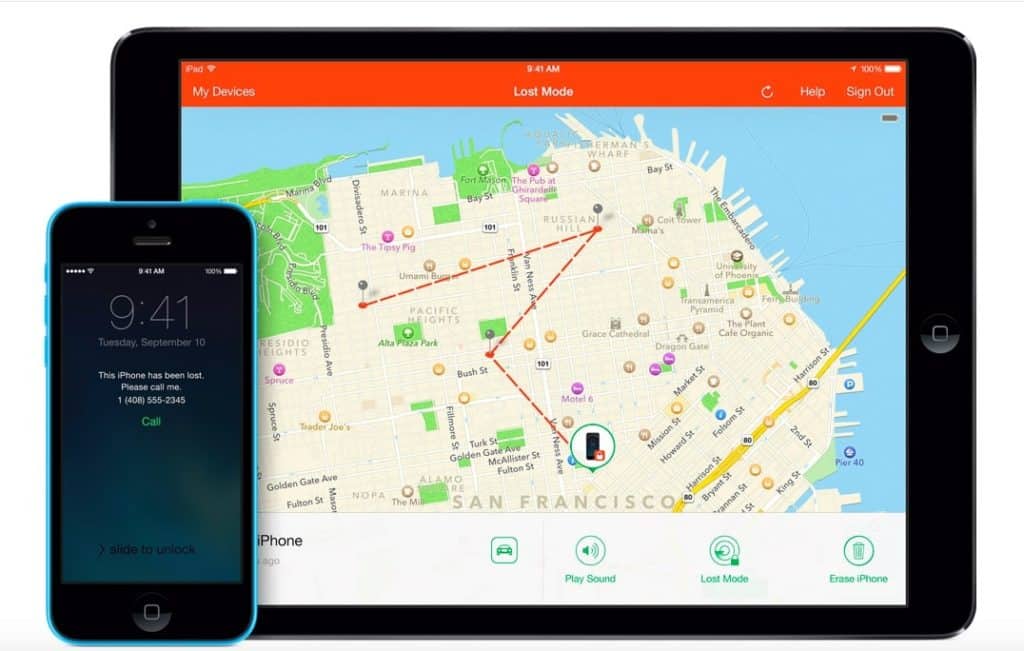
The loss or theft of an iPad is less common than an iPhone, but it still occurs. That’s why Apple included a Find My iPad feature. It should be set up by default, but you should double-check and familiarize yourself with the ins and outs of utilizing this function.
Launch Find My (pre-installed on your iPad) and set your current location settings. Next, a map (presumably showing your current location if this is the first time you’ve set it up) and little icons of linked devices will appear. If you click on the gadget icon, a help menu will pop up. You may set up alerts for when the gadget is lost or found, and it can make a sound to assist you in locating it. If you can’t find your iPad among the sofa cushions, you may report it lost by pressing Activate on the panel and following the on-screen instructions.
You can find your misplaced iPad, even if it’s buried in the couch cushions, using the Find My app on your iPhone or other Apple devices using the same Apple ID. You can do this by sounding an alert on the iPad until you find it.
Remote wiping allows you to delete all data from your iPad in case you lose it for good. Use the panel’s Erase This Device button. Your iPad has to be connected to the internet before it can be used for location sharing, playing a sound, entering Lost Mode, or being remotely deleted.
Tweak Your Privacy Permissions
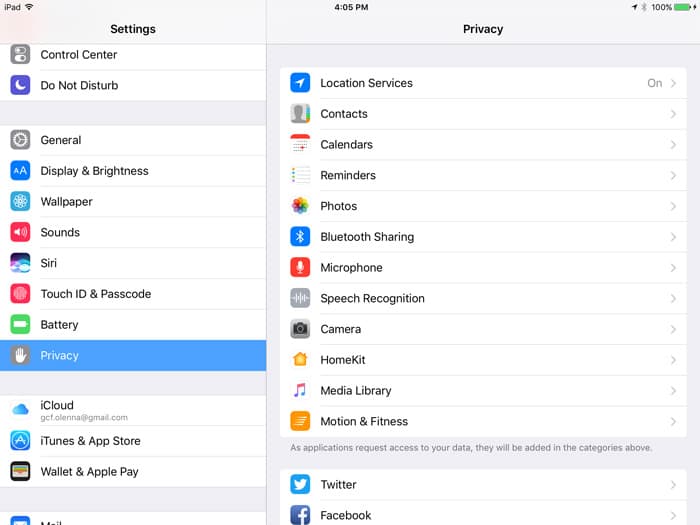
Simply launch the Settings app and then choose the Privacy icon from the left menu to make changes to your privacy settings. Location services and the ability to monitor your movements across different websites and applications can be toggled on and off in the privacy settings.
Additionally, you can see which installed applications have access to your media files, microphone, and contacts. These permissions are often granted during the initial installation of an app, but they can be changed or removed at any time under this section.
Get an iPad Case
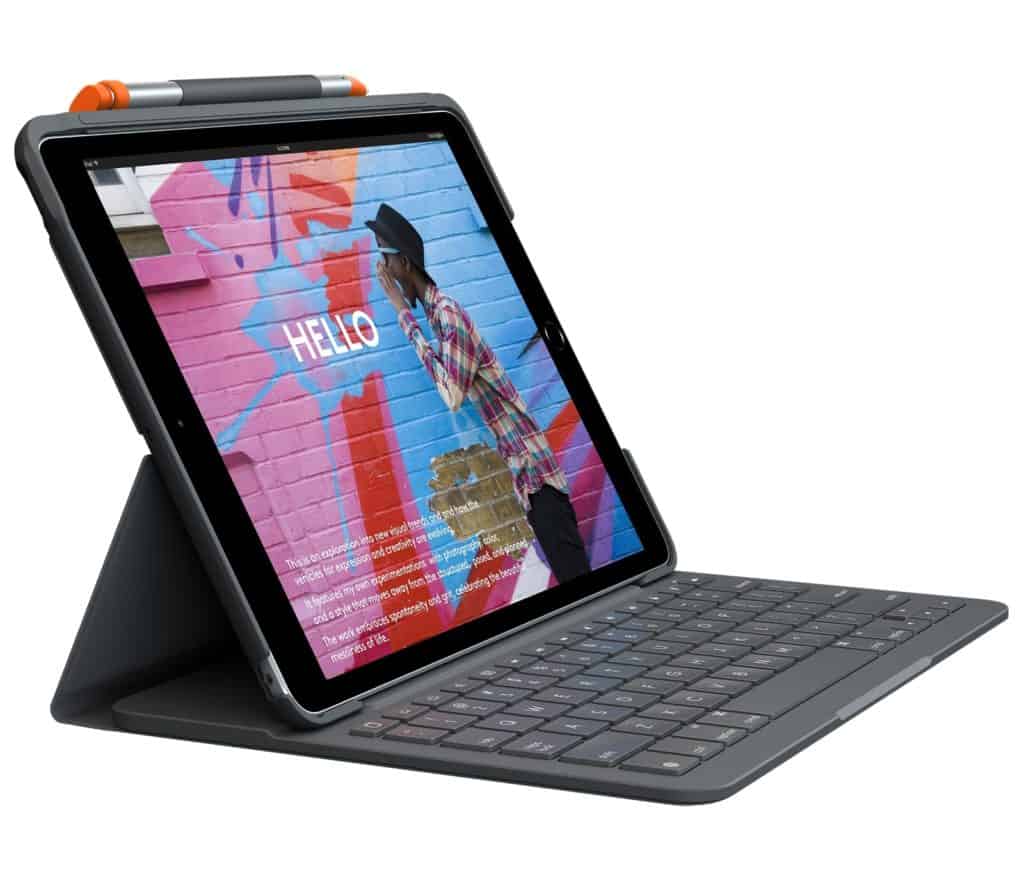
While the prospect of downloading new applications and customizing your settings is exciting, a broken screen will put a brake on your enthusiasm. Safeguard your iPad with a cover; you may avoid spending additional money on repairs when the tablet slips out of your hand.
Many third-party manufacturers, like Otterbox and Logitech, offer different types of cases for your iPad. You can also opt for the smart folio case that comes with a keyboard. It will not just protect your iPad but also enhance your productivity!
You can learn a lot more about the iPad than what is included in this list. The Tips app on the iPad can offer even more assistance in understanding and setting up your brand-new iPad.
There’s also Apple’s comprehensive online guide to the iPad, which covers many of the device’s in-app functions in detail.
Accessorize your iPad
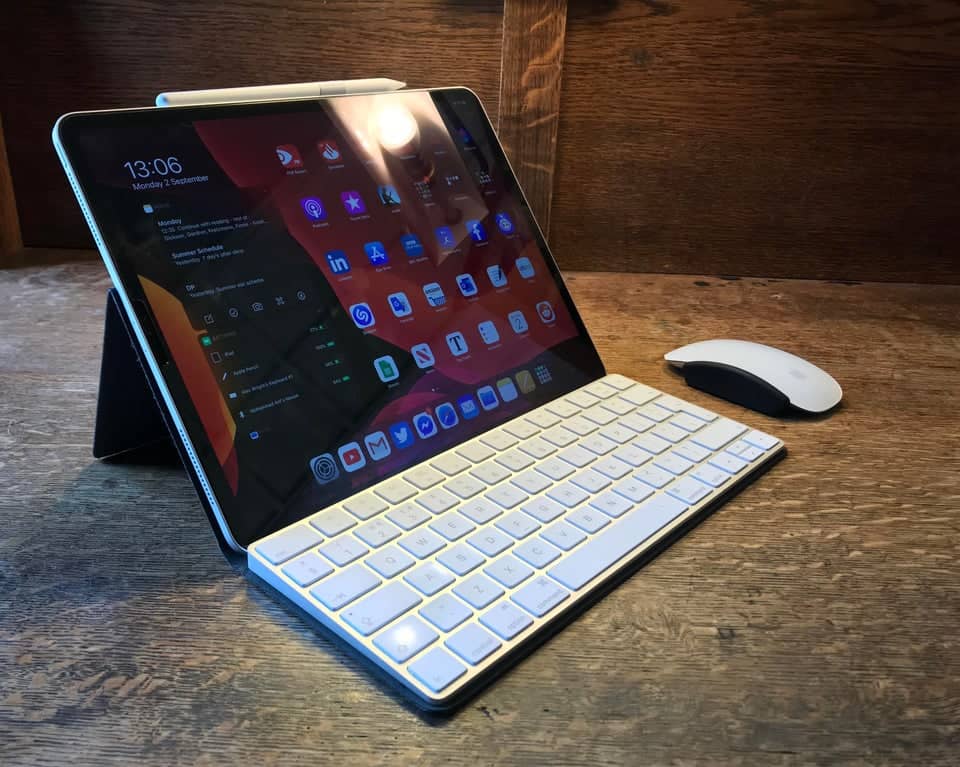
To make the most of your new iPad, you need to set it up to handle all your tasks and bring your iPad on par with your laptop. The best way to optimize your tablet is by adding accessories like a wireless Apple Magic Mouse and keyboard.
The iPad supports external input through Bluetooth, so you may use a mouse, keyboard, or trackpad instead of the touchscreen. Using a keyboard and mouse with an iPad is as easy as opening Bluetooth settings and starting the pairing process.
You can just carry your iPad around, and once you connect the accessories, it transforms into a workstation!
Get AppleCare+
AppleCare+ is a service plan that extends the original warranty on your iPad or iPhone. Apple allows you some time to consider whether or not you really need it. It may be purchased simultaneously with the device or within 60 days of purchase. It can also be stretched out over two years through a monthly subscription service.
You can still get AppleCare+ if your iPad requires servicing after you opt out of the plan. You won’t be covered for that particular service, but you will be if anything else breaks in the future.
Apple’s industry-leading support staff backs every iPad for the first 90 days and their one-year guarantee. This warranty is extended by an additional year with AppleCare+, giving you two years of protection from the date of purchase for both hardware and technical assistance with your iPad.
Two other incidences of inadvertent harm are also included. It costs $49 plus surcharges to process each claim. However, even at this reduced rate, you’re still saving money compared to the full cost of a repair. You can get help with AppleCare+ anytime, anywhere, through email, chat, or phone.
Get Creative With Apple Pencil
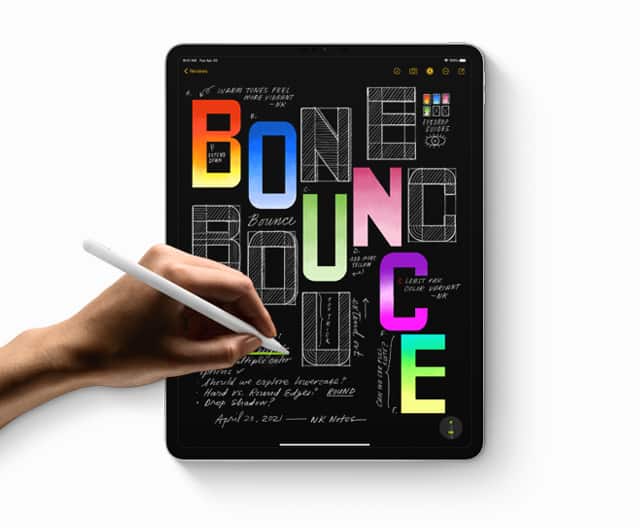
Apple’s recent iPads are compatible with one of the two kinds of Apple Pencils, and they are easily the greatest accessory you can acquire for using an iPad. You should consider purchasing one!
Using an Apple Pencil, you can not only draw and sketch in various iPad applications like Notes and Pages, but you can also use it to browse and write in any text field, which the iPad will then interpret as the written text.
For instance, you may launch the built-in Notes app and begin doodling with the Pencil. The same is true for everything from Safari queries to Calendar invites to Messages.
Since there are two distinct Apple Pencil models — Apple Pencil and Apple Pencil 2, selecting the right one for your iPad is essential. You can find your iPad’s model number in Settings > General > About. The “Model name” section shows your iPad’s model number.
Apple Pencil compatible iPads:
- iPad (6th generation and Later)
- iPad mini (5th generation)
- 12.9-inch iPad Pro (1st and 2nd generation)
- 10.5-inch iPad Pro
- 9.7-inch iPad Pro
- iPad Air (3rd generation)
Apple Pencil 2 compatible iPads:
- 12.9-inch iPad Pro (3rd generation and later)
- 11-inch iPad Pro (All models)
- iPad Air (4th generation)
- iPad mini (6th generation)
Set Up Siri On Your iPad
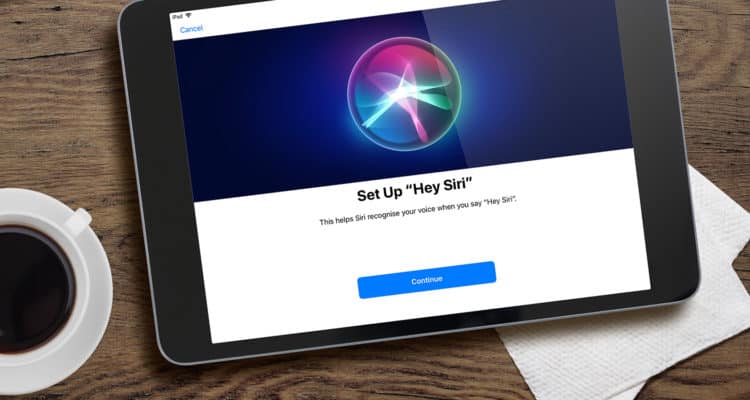
Siri is a reliable voice-activated virtual assistant, but it can’t do much for you unless you train it to understand your commands. Upon activation, Siri provides immediate feedback to inquiries and requests, enables hands-free use of the device, and even provides comedic relief. Get started with Siri on your iPhone or iPad by following these instructions.
How to set up Siri on an iPad
You’ll need to perform this setup on your newly bought iPad. Follow the step-by-step instructions below:
- Go to Settings > Siri & Search.
- Toggle on “Listen for Hey Siri.”
- Now, tap Enable Siri option in the pop-up.
- In the new pop-up, tap Continue.
- Follow on-screen instructions as asked. Make sure you complete the entire process to calibrate Siri on your iPad.
- Once done, tap Done.
Learn Gestures On iPad
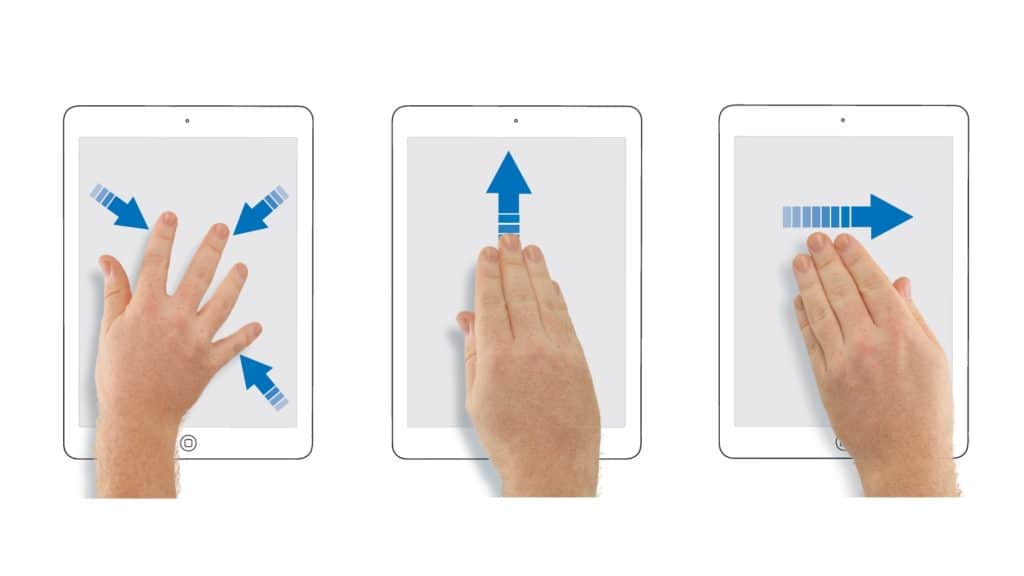
Intuitive gestures make the iPad a breeze to operate. There are several lesser-known gestures on the iPad, such as access to a secret control panel, a virtual touchpad, and the option to use split-screen mode. You can accomplish much more with your iPad when you pair these gestures with Siri’s abilities to help you schedule meetings, appointments, and more.
Here are some of the popular gestures for your iPad:
- Pinch to Zoom
- Swipe Down for Spotlight Search
- Swipe from the Top Corner for the Control Center
- Use Two Fingers on the Keyboard for the Virtual Trackpad
- Four Finger Side Swipe to Navigate Apps
You can find more gestures on Apple’s dedicated support page.
Try Split View
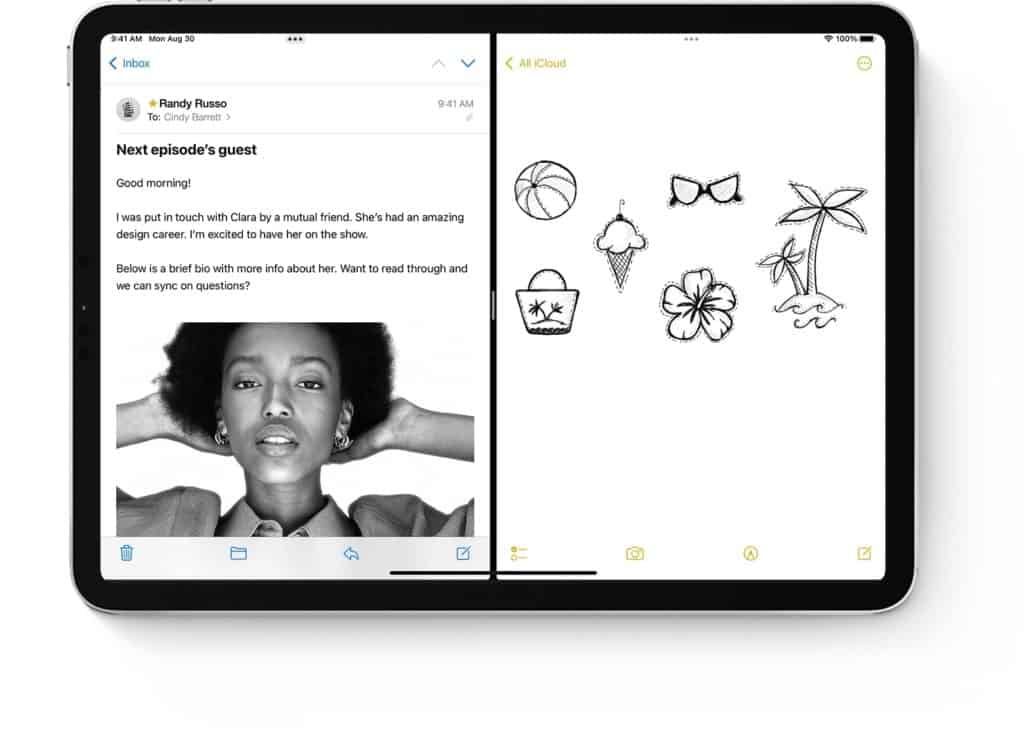
One of the major benefits of using an iPad over an iPhone is the ability to split your screen into two separate panes and do several tasks simultaneously.
To get Split View, start the first app as usual, and then drag the other app’s icon from the dock towards the left or right of the screen. And you guessed it; this only works if the app is already on the dock. If it works, the screen may be divided in half using a sliding divider.
You can also make the secondary app a tiny window that sits “above” the main one if you just need it as an easy overview. Perhaps, the tutorial below can help you understand it better:
Install Some Amazing Apps
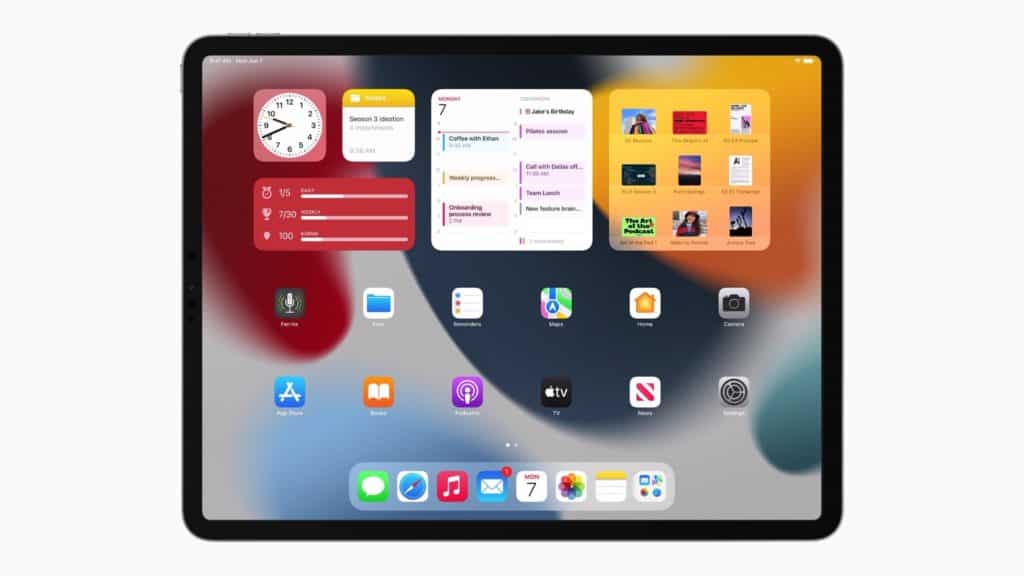
To get the most out of your iPad, you will need some awesome apps to let iPadOS perform at its best! We wrote a dedicated article on the best apps for a new iPad — and from the top of our list, we recommend apps like 1Password, YouTube, Dropbox, Kindle, and Pocket! Get as many apps as you need to turn your iPad into your primary work/play device.
This brings us to the end of our listicle; we hope our recommendations help you optimize your iPad and equip it with all the services and gears it needs to perform well! Did we miss any important recommendations? Let us know in the comments!

Leave a Reply